Step by Step: How to Decorate a Christmas Tree With Ribbon
This post may contain affiliate links. Please read our Disclosure Policy.
Want a stunning, full Christmas tree? In this step-by-step tutorial, I’ll show you how to decorate your tree with ribbon to achieve that designer look and add a pretty pop of color and texture!
This post may contain affiliate links. For more information, please see our disclosure policy.!
Watch this video to learn the start-to-finish, step-by-step method to decorate a Christmas tree.
The holiday season is the perfect time to showcase your creativity, and ribbon can transform your Christmas tree into a stunning centrepiece. Whether you prefer a classic or whimsical look, the right ribbon adds depth and magic. In this tree decorating tutorial, I’ll share designer tricks and my secrets for choosing and arranging ribbons to help your tree shine. This easy step-by-step process will guide you in styling your tree, ensuring that regardless of your budget or color palette, you achieve the professional Christmas tree look you’ve been after! When you become comfortable with this technique, you can move on to more other ribbon ideas that I share in this post- Christmas Tree Ribbon Ideas: Easy Ways To Add Ribbon To Your Tree.

Gather Supplies
- Christmas Tree Ribbon: Choose a variety of widths, textures, and colors to match your theme. Wired ribbon offers maximum flexibility.
- Scissors: For cutting the ribbon to your desired lengths.
- Bobby Pins: To secure the ribbon in place on the tree.
- Decorative Picks or Sprays: Optional, for added texture and depth.
- Ornaments: Coordinate with your ribbon for a cohesive look.
- Lights: Lights will enhance the overall design if not already on the tree.
- Tree Skirt: To complete the look at the base of your tree, select a skirt that complements its theme, or opt for a tree collar to save space and fully cover the tree stand.

In what order do you decorate a Christmas tree with ribbon?
If you’re new to adding ribbon to your Christmas tree, you might be asking, “Should I put the ribbon on first or last?” The best approach is to add the ribbon first; this way, if you need to adjust, you can easily tuck in strands later. For the ultimate decorating experience, follow the guide below for the correct order of tree decoration.
How to Decorate a Christmas Tree Step-by-Step
Step 1- Tree Prep
- Organize Your Ornaments: Sort your ornaments into piles by color, shape, and size. Be sure to create a special pile for cherished or standout pieces that you want to highlight on the tree.
- Fluff the Tree: If you’re using an artificial tree, fluff the branches by bending them in various directions. If your tree isn’t pre-lit, add the lights now.
- Add the Tree Topper: Position a smaller branch in front of the main stem to support the topper, then wrap the larger main branch around its base. This helps the topper sit securely within the tree instead of awkwardly perched on top.
- Protect Your Floor: If your tree is on a hard surface, lay down a blanket underneath. This will cushion any dropped ornaments and help prevent breakage.

Step 2– Ribbon
What type of ribbon is used when decorating a Christmas Tree?
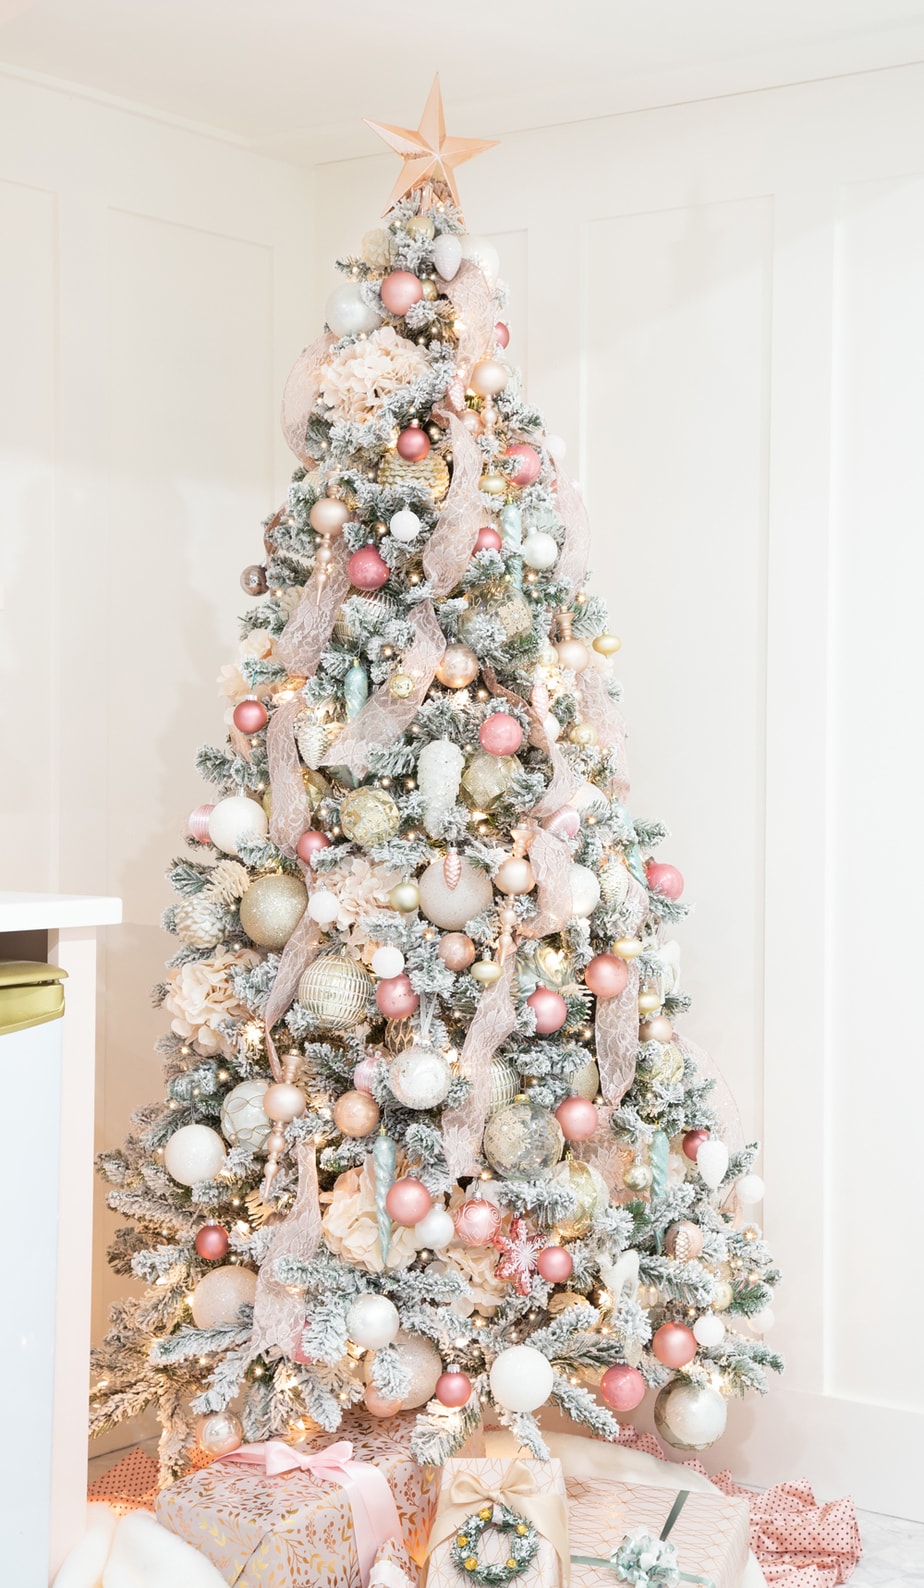
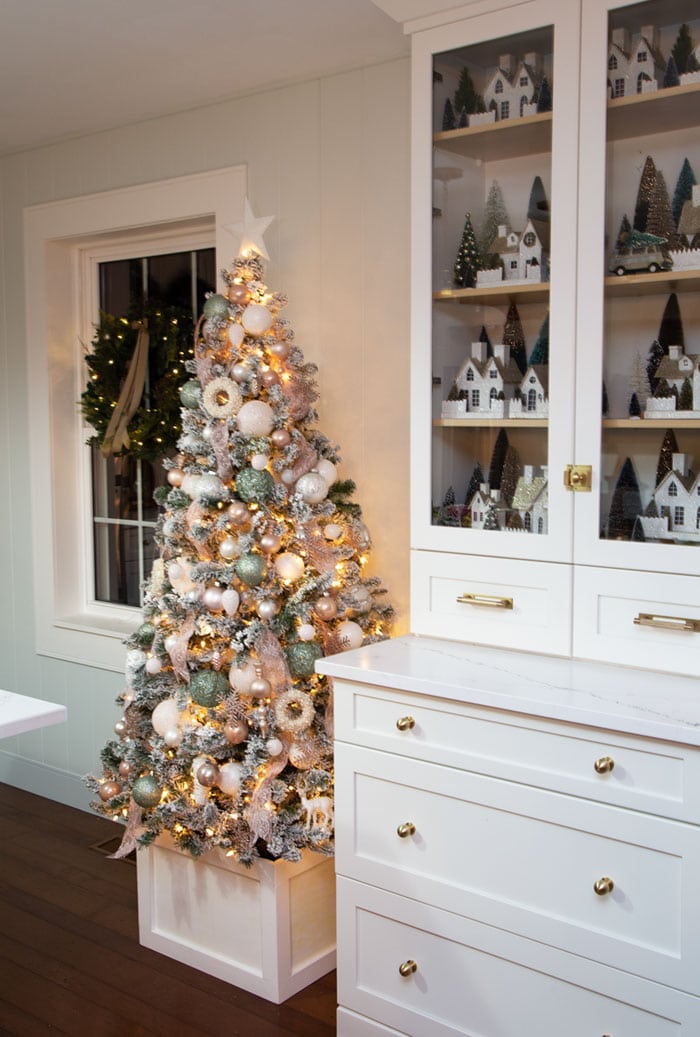
There are many kinds of ribbons to choose from for decorating a Christmas tree. Wired ribbon is most common because it will keep its shape whether it is put on as a cascade down the tree or wrapped horizontally. There are ribbons with different textures- like mesh ribbon, velvet ribbon, or burlap ribbon, with different widths (the bigger the better 2-4″ in width), and a rainbow of different colours to choose from. Traditionally gingham, plaid ribbon, and red ribbons are the most popular Christmas ribbons. Changing the style of the ribbon or trying different ribbons is an inexpensive way to try out new trends without changing all your ornaments.
A few of my favorite ribbons- Linen and Lace Ribbon, French Blue Ribbon, Suede Ribbon in 30 Colors, White Lace Ribbon, Neutral Plaid Ribbon, Red Velvet Ribbon, and Satin Ribbon. In addition, the 50-yard ribbon rolls at Costco are the best bang for your buck.
How Much Ribbon Do I Need to Decorate a Christmas Tree?
To decorate a Christmas tree with ribbon, a good rule of thumb is to use about 30-40 yards of ribbon for a 6-7 foot tree. For larger trees, you may need 50-100 yards. The amount can vary based on your desired look, so consider how prominently you want the ribbon to feature. It’s always better to have a little extra, as you can use leftovers for other decorations and wrapping presents.
How To Decorate a Christmas Tree with Ribbon
*As a reference, the tree in this tutorial is 6.5 feet, decorated on 3 sides. I used a (1) 25-foot roll of ribbon and a half package of bobby pins.
- Cut arm lengths of ribbon. 1 spool will give you approx 8-10 strips of ribbon. By cutting strips you will save so much ribbon from one consistent piece.
- Cut one end of each strip into a fishtail. Fold the ribbon end in half and cut a diagonal line from the middle towards the outside edge.
- Begin at the top of the tree with one strip. Scrunch the blunt cut end of the ribbon together and attach it to a branch with a bobby pin.
- Allow the ribbon to naturally fall in place. Gather it approx 8-10″ down from the top, scrunch it together, but this time give it a bit of slack letting the ribbon loop out in a ‘C’ then use a bobby pin to attach it to a branch back approx 5″ from the tip, towards the stem of the tree.
- Repeat this process. Each strip of ribbon will be attached to the tree 3-4 times.
- Allow the fishtail end of the ribbon to hang.
This method of putting the pieces of ribbon on a Christmas tree can be used with both wired and non-wired ribbons. If you prefer, this same method can be used to go horizontal or diagonal as well.

Step 3- Decorative Picks
I am using faux flowers on this tree, but greenery stems, berries, pinecones, etc. all look beautiful. Depending on the type of picks you are using they may require a little fluffing before beginning.
Place the picks evenly throughout the tree filling any holes, ensuring they are evenly spaced and not too close to one another.
Step 4- Oversized Bulbs
Work oversized bulbs deep into the tree to fill large holes and disguise the trunk of the tree. Work them into the branches, placing them in an irregular pattern.

Step 5- Filler Ornaments
Filler ornaments are going to do just that, fill up the main body of the tree. Here I’d suggest using your not-so-special ornaments (I use a big tube of plastic ones). Start with the largest ones down to the smallest, filling in holes inside the tree, and saving the outer edges of the branches for the next step.
Don’t neglect the very bottom row of branches. Be sure to add a few ornaments that will dangle down below where the tree stops.
Step 6- Accent Color
Place the accent bulbs near the outer edge of the branches. This will make the color pop! The accent color for this tree is… you guessed it, PINK! I have a variety of shades of pink in different shapes and sizes that I layer in. Again, irregular patterns and no two bulbs of the same color are too close to one another.
If you need some guidance choosing a color scheme for your Christmas tree, read this guide aimed at choosing the best Christmas colors for your home.

It is ok to have more than one accent color, just be sure to mix up the cristmas decorations so they are evenly dispersed throughout the tree.
Step 7- Special Ornaments
Save the best for last! The final step in decorating your tree is to add any ornaments that spark those Christmas feels and give visual interest to the tree. Sentimental pieces, expensive glass bulbs, ornaments you may only have a few of, the ones that make you go awwww when you open the box each year. Add in these Christmas decorations throughout the entire tree.

Step Back And Adjust As Needed
As you decorate your Christmas tree, take a moment to step back and assess the overall look from a distance. This allows you to see how all the elements come together and discover any areas that may need your attention. Reposition ornaments or add more ribbon to ensure a balanced elegant look.

Extra Tips And Tricks For The Perfect Ribbon Tree
- Add Filler Ribbons: If you have extra ribbon, cut small pieces to fill in gaps or accentuate areas of the tree. This can enhance the overall design without overwhelming the look. You can use these techniques on any type of Christmas tree, real or artificial. See how to decorate a 12′ real Christmas tree using these steps. Additionally, you can see how I applied these designer tree decorating tips to a real and artificial tree in this post.
- Choose Your Ribbon Wisely: Wider ribbons create larger, more dramatic billows, while narrower, lightweight ribbons require shorter billows to maintain their shape. Consider the overall look you want to achieve.
- Start with One Piece: Cut only your first piece of ribbon (approximately arm’s length) and experiment with it. This will help you determine what works best for your tree’s height and style.
- Cut One Spool at a Time: Only cut ribbon from one spool at a time. If you don’t use it all, you can return the excess or repurpose it for another holiday project.
- Layer Textures: Consider using a mix of ribbons with different textures (e.g., satin, burlap, or glitter) to add visual interest to your tree design.
- Balance Your Design: Distribute the ribbon evenly around the tree, ensuring that it complements your ornaments and other decorations for a cohesive look.
You can use these techniques on any type of Christmas tree, real or artificial. You can see how I applied these designer tree decorating tips to decorate my Blue and Gold Tree last year.
Still, looking for more Christmas tree decorating ideas? Check out The DIY Mommy’s step by step process where she shows her tree-decorating techniques as well.


Do you have any tips on how to decorate a Christmas tree with ribbon? Let me know in a comment below.
Thank you for your excellent tips. The video really helps however I can’t hear your instructions—but the music is SUPER loud when you are applying the ornaments.
This tree is stunning! That mint color paired with the pink is such an excellent combo!
Wow! So beautiful!!! I really like your Christmas Tree!
Thank you so much Elizabeth!