Vertical Shiplap: A Timeless Choice for Classic Interiors
This post may contain affiliate links. Please read our Disclosure Policy.
Vertical shiplap is a design feature that blends classic charm with modern sophistication. Unlike traditional horizontal planks that great in popularity over the past few years, vertical shiplap draws the eye upward, creating the illusion of higher ceilings and adding architectural interest to any space. Whether you’re aiming for a cozy cottage feel or a sleek, contemporary look, vertical shiplap is a versatile and timeless addition to your home.

As an interior designer, I find myself constantly drawn to shiplap’s versatility and timeless appeal. It’s become one of my signature design elements—I’ve incorporated it into countless client projects and even my own home. The transformation it brings to a space is remarkable, and I’m excited to share some of my favorite applications:
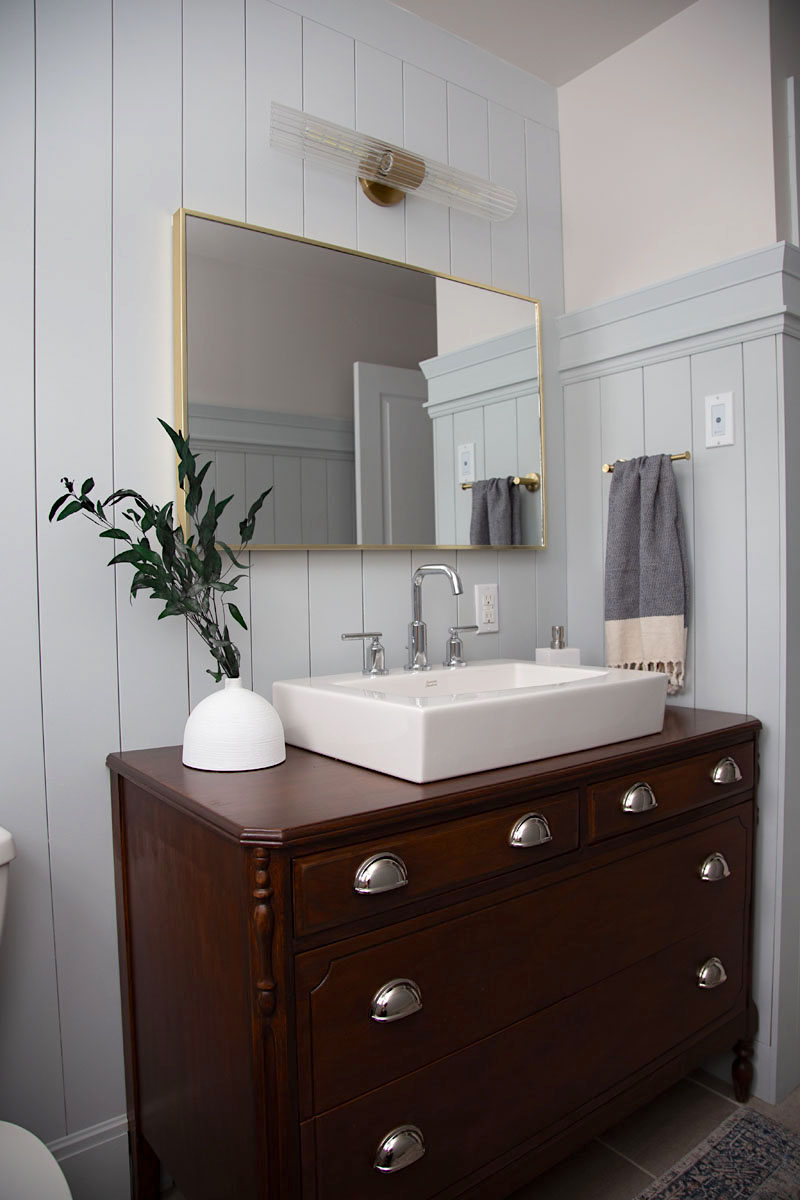
• Small Bathroom Makeover Ideas – I was amazed at how shiplap added instant charm and texture to my modest bathroom refresh, all while staying within budget.
• Basement Shiplap Walls – After installing a shiplap in my basement, I’ve perfected the technique and love sharing these expert tips in this full shiplap tutorial.
• Basement Master Bedroom Design – A recent project where I used shiplap to create the coziest retreat.
I’ve seen firsthand how shiplap brings warmth, texture, and timeless style to any home. Whether I’m designing for clients or updating my own space, it’s a design element I return to again and again. Keep reading to explore how vertical shiplap can elevate your space!

What Is Vertical Shiplap?
When I introduce clients to vertical shiplap, I describe it as a classic wall treatment where boards are installed vertically, creating clean lines that draw the eye upward. While traditionally used in farmhouse designs, I’ve found it to be incredibly versatile, working beautifully in traditional and modern farmhouses, modern coastal homes, cottages, cabins, European transitional spaces, and even more contemporary spaces using smooth, crisp lines. The vertical orientation adds a fresh look to the familiar shiplap aesthetic that has captured everyone’s attention in recent years.

What is Vertical Shiplap Called?
In my years of design work, I’ve noticed there’s often confusion about the different terms used for vertical board treatments. While they’re all similar, each has its distinct characteristics. Shiplap features overlapping boards usually with a male and female side, while nickel gap boards have a precise, uniform space between them (traditionally the width of a nickel). V-groove and tongue-and-groove offer different connection methods, with tongue-and-groove providing a more secure fit. Beadboard, which I often use in more traditional spaces, has a distinctive rounded groove between boards that are usually closer together and the application is in a sheet rather than individual pieces. Understanding these differences helps me guide clients to the perfect choice for their specific projects.

Benefits Of Vertical Shiplap
One of my favourite aspects of vertical shiplap is its ability to visually elongate a room. In my own home, I used v-groove shiplap in my kitchen makeover which has standard 8′ ceilings, and the transformation was remarkable – the space instantly felt taller and more open. Beyond aesthetics, I appreciate how vertical installation naturally eliminates seams, resulting in a seamless and professional finish, even as a DIY project. Additionally, it’s forgiving when it comes to wall imperfections, and you can apply it directly to the studs and skip the drywall mess, making it a great choice for renovation projects.

Choosing The Right Type Of Material For Your Vertical Shiplap
Having worked with various materials over the years, I always tell my clients that choosing the right wood is crucial for both aesthetics and longevity when looking at real shiplap. Pine remains my go-to recommendation for budget-conscious projects. Clear pine will be a bit more expensive but lacks the knots for a cleaner look. Poplar is another good choice especially if you plan to paint the wood- it is known for its few, small knots, even grain structure, and smooth texture. These two wood options are affordable and take paint beautifully.

For clients with a healthier budget, a more refined hardwood like oak, walnut or cedar offers beautiful grain and adds to the overall design of a space. MDF pre-primed shiplap boards offer excellent stability and a perfect paint surface, unlike wood which is reserved for interior spaces only. These products are available at most retailers like Home Depot and are perfect for DIY vertical shiplap projects.

Vertical Shiplap Vs. Horizontal Shiplap
Does shiplap look better vertical or horizontal is one of the most common questions I get from clients, and my answer always depends on the space and desired effect. Vertical shiplap excels at creating the illusion of height and adds a classic touch to a room. I find it particularly impactful in spaces with low ceilings. Currently, it has a more updated look and is being used vertically. Vertical shiplap accent walls, in cabinetry and hutches, and half walls throughout the home paired with wallpaper or contrasting paint colour.

Horizontal shiplap, on the other hand, tends to make a room feel wider and often reads as more traditional, coastal, or rustic. As it was intended to be used historically. A horizontal application typically takes less prep work because it can be nailed directly to the studs or drywall at the usual 16″ increments with brad nails skipping the construction adhesive step.

Tips For Incorporating Vertical Shiplap In Your Home
Gone are the days of just a single feature wall—if your budget allows, I always recommend using wall treatments throughout an entire room for a more cohesive look. One of the best budget-friendly options is a half-wall of vertical shiplap.

Since most shiplap panels come in 8-foot pieces, cutting them in half doubles your coverage while cutting costs. Vertical shiplap is a great way to define spaces in an open-concept home and works beautifully as a fireplace façade, whether extending from floor to ceiling or just above the mantel.

Different Ways To Style Vertical Shiplap In Your Home
The versatility of vertical shiplap never ceases to amaze me. In my own home, I’ve incorporated it into my kitchen, bathroom, pantry, and bedrooms, mixing full and half-wall applications. For clients, I’ve installed it in entryways—painted in crisp white for a welcoming first impression—and even on ceilings for added character paired with wood beams. One of my favorite recent projects involved using a vertical shiplap in a home office, painted in a soft sage green—it completely transformed the space into a serene, inviting work environment.

Looking to add even more visual interest? Half-walls of vertical shiplap pair beautifully with patterned wallpaper for a charming touch. To achieve a more historic look, consider adding crown molding or a bold architrave. For a modern or farmhouse aesthetic, flat stock trim creates a clean, streamlined effect.

Adding Texture And Dimension with Vertical Shiplap
What I love most about this wall treatment style is its ability to instantly elevate a space with architectural interest. The subtle shadows created between the boards add depth that plain walls simply can’t match. I often use lighting—like wall sconces or downlighting—to highlight these textures and create dynamic effects throughout the day.
Beyond texture, shiplap serves as the perfect backdrop for artwork and décor, allowing layers to shine without overwhelming the space. Whether you’re designing a statement wall, an entire room, or a grand ceiling treatment vertical shiplap is a timeless way to add warmth and dimension.
Real-Life Examples And Inspiration
If you’re considering vertical shiplap for your home, there are so many creative ways to use it! In our showroom office, we installed a white V-groove shiplap on the ceiling, pairing it with deep navy cabinetry for a striking contrast. Behind a Frame TV, the shiplap creates a subtle yet stylish backdrop, adding depth without overwhelming the space.

For a coastal-inspired look, I recently designed a bedroom featuring vertical shiplap, black sconces, and soft blue bedding—it instantly brought a relaxed, breezy feel to the room.

Another favourite project was a coastal cottage where we used crisp white treatment on the ceiling, giving the space an airy, light-filled charm.

And for a client’s fireplace, we incorporated vertical shiplap with a built-in TV niche, creating a seamless, polished design that made the fireplace a true focal point.
No matter your style, it is a versatile choice that adds character and depth to any space!
FAQ
While shiplap remains a favorite, design trends continue to evolve! We’re seeing a shift toward fluted and reeded panelling, slat walls, and even tongue-and-groove panelling for a more refined look. Fluted walls add a touch of Art Deco sophistication, while slat walls provide a contemporary, airy feel—perfect for modern spaces. If you love the texture of shiplap but want something fresh, consider painting it in deep, moody tones or using it in unexpected places like ceilings or cabinetry for a modern twist.
-Prepare the Wall – If you’re installing over drywall, make sure the surface is clean and smooth. If you’re attaching directly to studs, consider adding a vapour barrier if needed.
-Measure and Cut – Most shiplap boards come in 8-foot lengths, so measure your space and cut accordingly. If doing a half-wall, cut each board in half to maximize coverage.
-Attach to the Wall – Use a level to ensure your first board is perfectly straight, then nail or glue it in place. Continue adding boards, and using spacers if needed to maintain consistent gaps.
-Finish the Edges – For a polished look, add trim or molding at the top and base.
-Prime and Paint (if desired) – If you’re painting, use a quality primer and finish with durable paint that complements your space.
You can find more details in this video tutorial from Angela Marie Made.
Yes! You can install shiplap directly onto studs, and in some cases, it’s even recommended. Just keep in mind that without drywall behind it, the gaps between boards may show more, so it’s best to paint the studs a matching color beforehand. If you’re installing in a bathroom or kitchen, be sure to use moisture-resistant boards and consider adding a vapor barrier for protection.

Why Vertical Shiplap Is A Classic Design Choice With Timeless Appeal
Trends come and go, but vertical shiplap has stood the test of time for a reason. Its clean lines create an elegant sense of height, making rooms feel taller and more spacious. Unlike trendy wall treatments that can feel outdated quickly, vertical shiplap blends seamlessly with different styles—whether it’s modern, traditional, coastal, or farmhouse. Plus, it adds just the right amount of texture without overpowering a space.
Whether you’re looking to add subtle architectural interest or create a bold design statement, vertical shiplap is a tried-and-true choice that will never go out of style.


