How To Make A Pom Pom With A Cardboard Template
This post may contain affiliate links. Please read our Disclosure Policy.
Ready to add some fluffy fun to your crafting projects? I will walk you through how to make a pom pom using simple cardboard templates. Whether you’re decorating a beanie, sprucing up a gift, or just looking for a fun afternoon activity with the kids, these bobble poufs are perfect for crafters of all ages.
Why You’ll Love Making Your Own Pom Poms
Pom poms add such a playful touch to practically any project. And once you get the hang of making them, you’ll want to add these fluffy little balls of yarn to everything!
If you enjoy working with yarn, you might also love some of my other yarn-based projects like my Easter Chick Spring Wreath, this cute Heart Shaped Wreath, these charming Yarn Wrapped Hearts, or these Yarn Handmade Bottle Brush Trees that are popular at Christmas. If you’re interested in knitting or crocheting, try your hand at this super simple Beginner 1-Hour Cowl or this Free Mitten Pattern
What You’ll Need
Let’s gather our supplies before we start. The beauty of this easy pom pom tutorial is that you probably already have most of these materials at home:
- Optional extras: A ruler or compass for measuring, or if you get really into making these, you might want to invest in a set of plastic pom pom makers from your local craft store
- Cardboard: Upcycle those cereal boxes or any sturdy piece of cardboard you have lying around
- Yarn: Choose whatever color and texture you love – wool and cotton both work beautifully
- Sharp scissors: Trust me, sharp scissors make this process so much easier and safer

Creating Your DIY Pom Pom Maker
First things first, let’s make our cardboard template. This will be your reusable maker that you can use again and again:
- Using a compass or tracing around a circular object (like a drinking glass), draw two identical circles on your piece of cardboard. The size of your circles will determine the size of the pom pom (the bigger the circle, the bigger the finished result).
- Cut out both circles carefully.
- Next, cut a smaller circle in the center of each, creating two cardboard rings. Think of them like donuts!
- If you plan to make these often, consider reinforcing your cardboard rings with tape for durability. This also makes the cutting step much easier.

How To Make a Pom Pom
The easiest way to make Fluffy Pom Poms is with a simple trick I learned early on. I’m going to show you a time-saving technique that skips the traditional method of wrapping a single strand of yarn for what feels like forever.
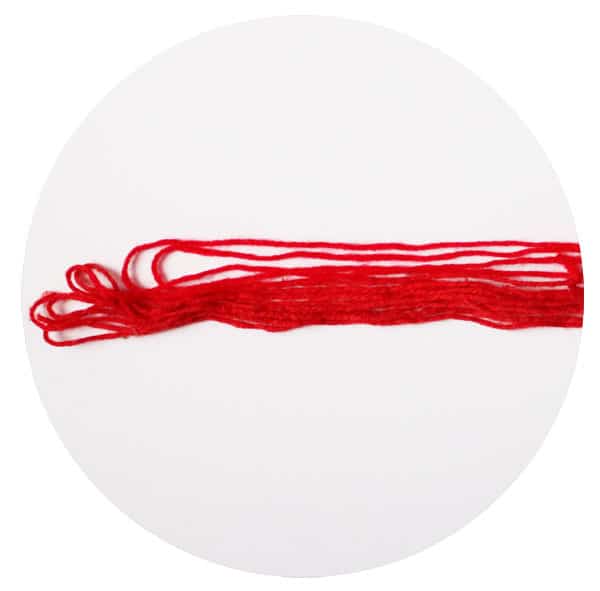
Prepare The Yarn
Instead of wrapping one strand at a time, let’s work smarter:
- Next, cut a strand of yarn about 3 feet long and fold it in half (end over end) until you have roughly 15 strands. If you’re using bulky yarn, you’ll need fewer strands.
- This makes the wrapping process so much faster!
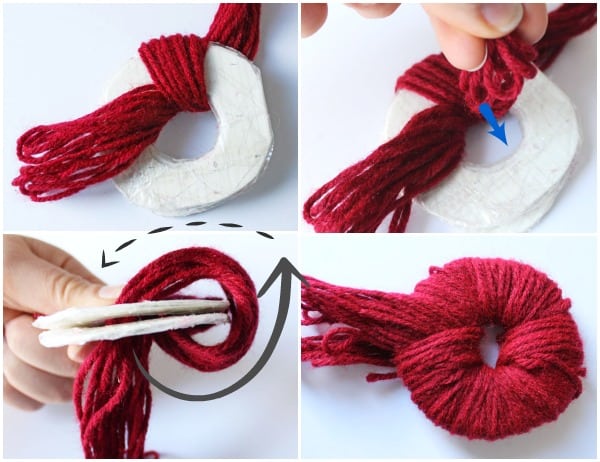
Making the Pom Pom
- Sandwich your two cardboard rings together, one on top of the other, so the centre holes line up.
- Begin wrapping your yarn bundle around the rings, passing it through the center hole each time. Keep laying each new wrap beside the previous one, not on top.
- Continue wrapping until you’ve covered the rings completely with enough yarn to make a nice fluffy pom pom. The centre hole will begin to get very small. The more yarn you use, the fuller your yarn pom pom will be!
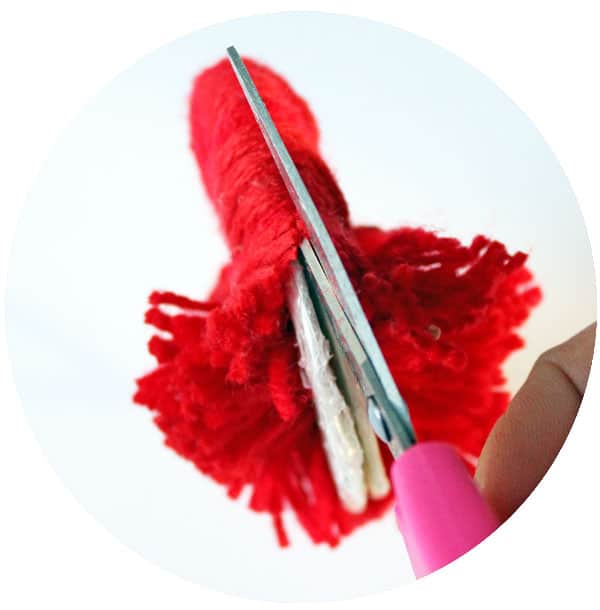
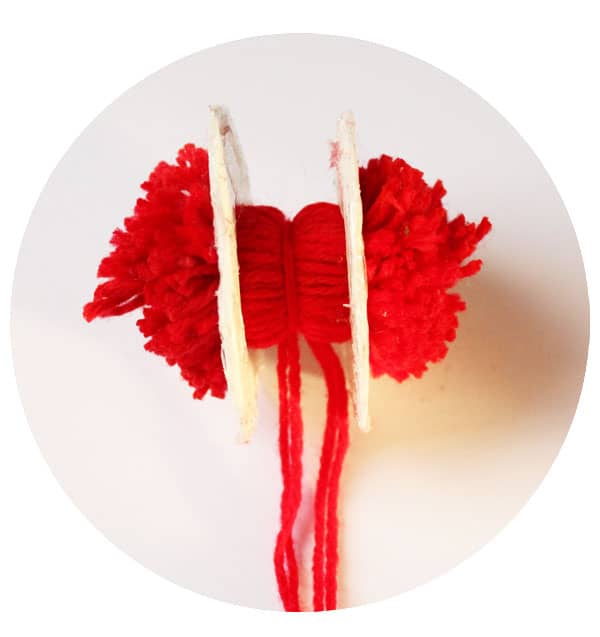
Tying and Cutting
- Once you’ve wrapped enough yarn, carefully slide your scissors between the two cardboard rings and begin cutting around the outer edge. You’re cutting through all those loops of yarn you’ve created.
- As you cut, hold the yarn in place so it doesn’t shift. This can be a bit tricky, but you’ve got this!
- Cut a separate piece of yarn approx 24″ long and double it over.
- Before removing the cardboard, thread the length of the yarn between the two rings. Tie this tightly around the center of your bobble, making a sturdy knot. Leaving long yarn ties which you can use to attach your pom pom to your project.
Fluffing The Bobble
- Use the scissors and trim any uneven strands to create the perfect sphere. This step transforms your pouf from “homemade” to “wow, that looks professional!”
- Now you can remove the cardboard rings, by sliding them off each end, and it will start to take shape!
- Holding the centre strand give it a gentle shake a couple of times to fluff out the yarn.
Other Easy Methods to Make Pom Poms
If you’re looking for different ways to make these or want to experiment with different sizes:
- Hand wrapping: For a quick and easy method, you can wrap yarn around your fingers, though the cardboard template gives more consistent results
- Plastic pom pom makers: These are available at most craft stores and come in sets with various sizes
- Fork method: Perfect for making mini pom poms – just wrap your yarn around the tines of a fork!

Creative Ways to Use Your DIY Pom Poms
Now that you know how to make perfect these with a cardboard template, what can you do with them? So many things!
- Add them to hats, scarves, or blankets for a cozy touch: Imagine a warm winter hat with a fluffy pom pom!
- String them together to make a colourful garland: Perfect for parties or adding a touch of whimsy to any room. You could even create holiday-specific garlands like this DIY Pom Pom Holiday Wreath from DIY in PDX.
- Create adorable animals or characters: Check out this Aminmal article from Martha Stewart.
- Use them as gift toppers instead of bows: A unique and charming touch.
- Make a rug (this is ambitious but amazing!): For the ultimate yarn project, check out How to make a pom pom rug from Little Yellow Wheel Barrow.
- Accessorize your bags: Create a stylish Poolside Cool DIY Pom Pom Tassel Circle Pool Bag like the one from Sugar and Cloth.
- Make festive party hats: Add some fun to any celebration with a DIY Pom Pom Party Hat like the one from Tell Love and Party.
- Enhance your wardrobe: Add them to your clothing for a playful look, just like shown in this Pom Pom Wardrobe article from The House That Lars Built.
- Create seasonal decorations: For example, make a DIY Pom Pom Easter Egg Tree
- Personalize your home decor: Create custom items like DIY Pom Pom Letters for Mom, as seen on Marla Meridith.

Frequently Asked Questions
The cardboard template method we’ve covered is one of the easiest ways, especially if you use the bundle technique rather than wrapping a single strand of yarn.
Try wedging a knitting needle or crochet hook between the two layers of your cardboard rings. This makes it easier to insert your scissors when it’s time to cut the loops.
Blanket yarn tends to create extra fluffy bobbles, but cotton, acrylic and wool yarn can work nicely too. The key is to use enough yarn and fluff thoroughly!

Now you’re all set to make gorgeous, fluffy pom poms! This simple DIY project is perfect for crafters of all ages and skill levels. Whether you’re using them for decorations, gifts, or just for fun, homemade fluffy bobbles add that special handmade touch to everything they adorn.
Have you made them before? What’s your favorite way to use them? Share in the comments below!
This looks fantastic but as a pom-pom challenged person, can you give a little more detail (possibly in pictures) of how you wrap the yarn around the circles? Do you weave it in an S-shape through the hole from top to bottom? These look easier than the hand method I used as a kid. 🙂 Thanks!
Hey Claudine, I added a few more images and text, I hope this helps with the wrapping! After you’ve gave one a try I’m sure you’ll have the hang of it! Thanks for asking, sometimes a tutorial is clear to me… but thats because I’ve done it a 1000 times! Have a great day!
Perfect, thanks!
Awesome tutorial- thanks Virginia!!
Great tutorial, Virginia! Your poms are so fluffy and fabulous!
That’s pretty Virginia! Looking forward to the “Valentine’s Day Project” reveal!
Great tutorial! It looks so easy to make!!
I have been looking for a simple way to make pom poms because I saw a great DIY pom pom rug I want to make! You just made this project a whole lot easier! THANK YOU!
Awesome Diane! Glad its helpful, happy pom pom making!
Hi! I was trying to pin your pom pom tutorial, but my computer keeps giving me an error saying ‘authorization failed’. I would love to pin it so I can use it to make your pom pom wreath…so good by the way. Is there a reason I can’t pin it?
oh no!!! I’m not sure. Pinterest has been having some issues this past week. I’ll look into it. Thanks for the heads up!
Hi! I love this idea but wanted an idea of how much yarn is needed for your above picture and for the wreath project you mention in a later post. I didn’t want to buy too much yarn but I don’t keep yarn scraps on hand for this project. any advice would be helpful. Thanks, Virginia!
I would buy one ball of each color. Happy crafting!