Tall Dresser Makeover Tutorial with Trim and Paint
This post may contain affiliate links. Please read our Disclosure Policy.
Upgrading a plain dresser doesn’t have to be complicated. With a simple design using wood trim and a fresh coat of paint, you can give your dresser frame a brand-new look. In this step-by-step guide, I’ll show you how to add trim to dresser drawer fronts using tools as a miter saw, circular saw, and wood glue. Let’s get started!
Giving your furniture a high-end, custom look doesn’t have to be expensive or complicated. Just like adding a unique word to your tile flooring or painting vinyl siding for a fresh update, a simple trim upgrade can completely transform a basic dresser. If you love budget-friendly, high-impact DIY projects—like when I installed a shiplap wall in my basement—this project is for you! With just a few tools and a bit of creativity, I’ll show you how to give your dresser a stylish, custom feel with added trim. Let’s get started!

How To Add Trim Work to Dresser Drawer Fronts
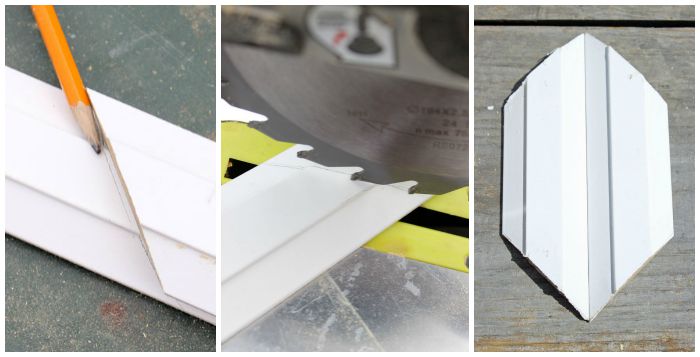
Step 1: Measure And Cut The Trim
Before anything else, remove the drawers from your dresser frame and inspect the piece for any structural issues. If needed, reinforce joints or repair grooves before continuing.
- To ensure uniform cuts, place your trim pieces back-to-back before cutting.
- Measure the length and width of each flat drawer front from the outermost edges.
- Using a miter saw, cut your wood trim at a precise angle for clean joints.
Always follow the golden rule: measure twice, cut once! Even a tiny misalignment can throw off your trim design.
Step 2: Sand And Paint The Trim
Once all trim pieces are cut, lightly sand the edges using grit sandpaper to remove rough spots. This step helps create smooth joints and grooves for a seamless finish.
- If you prefer a painted look, apply a first coat of paint before attaching the trim. This prevents paint buildup in corners and makes touch-ups easier later.
- Let the first coat dry before applying a second coat for full coverage.
Step 3: Prep The Dresser
Before attaching the trim, prep the dresser to ensure a strong bond.
- Lightly sand the drawer fronts to remove any glossy finish that might prevent wood glue from adhering properly.
- If your dresser is pine, consider priming it first to prevent knots from bleeding through the paint. I used BIN 1-2-3 to seal mine.
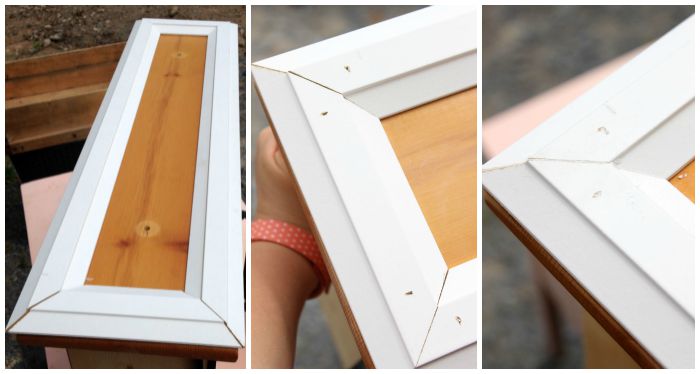
Step 4: Attach The Trim To The Dresser
Now it’s time to bring your trim design to life!
- Apply a thin bead of wood glue along the back of each trim piece.
- Carefully place each piece onto the drawer front, ensuring they are square and aligned.
- Secure the trim using pin nails or small finishing nails to hold everything in place while the glue dries.
- Wipe away any excess glue before it dries to prevent uneven surfaces.
Step 5: Fill In Any Gaps Or Holes
- After the trim is attached, fill in any small gaps or nail holes to create a polished finish.
- Once dry, lightly sand everything down with 120 grit sandpaper for a seamless look.
- Use wood filler to smooth out imperfections in the joints.
Step 6: Sand And Paint The Dresser
Now that your trim is in place, it’s time to give your dresser a fresh, updated look.
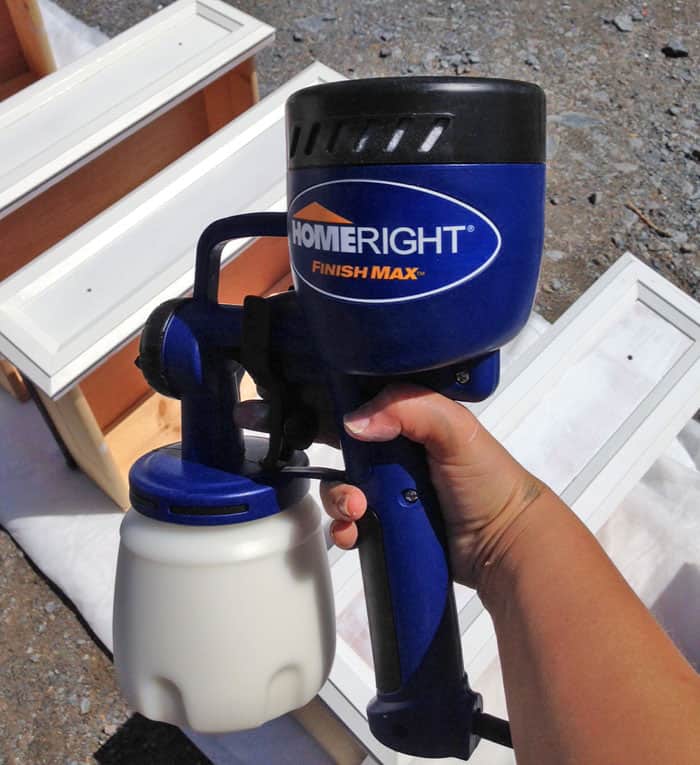
- Apply your first coat of paint using a roller or paint sprayer for a smooth, professional finish.
- Let it dry, then apply a second coat for even coverage.
Step 7: Finish With A Protective Coat
To ensure your dresser makeover lasts, apply a protective sealant.
- A clear topcoat will help prevent chips, scratches, and wear over time.
- Choose a finish that complements your style—matte for a modern look or glossy for a sleek finish.
- Allow everything to dry completely before reattaching the drawers.
If you are a first-timer at refinishing furniture with paint I would highlight suggest this Rust-Oleum Transformations kit. I used this furniture and cabinet painting kit a few times and the results were amazing.
Tips For A Professional Looking Finish
If using a darker paint color, consider using a tinted primer to reduce the number of coats needed.
- Always sand between coats for an ultra-smooth surface.
- Use a roller or paint sprayer to avoid brush strokes.
- Test your trim design layout before permanently attaching pieces.
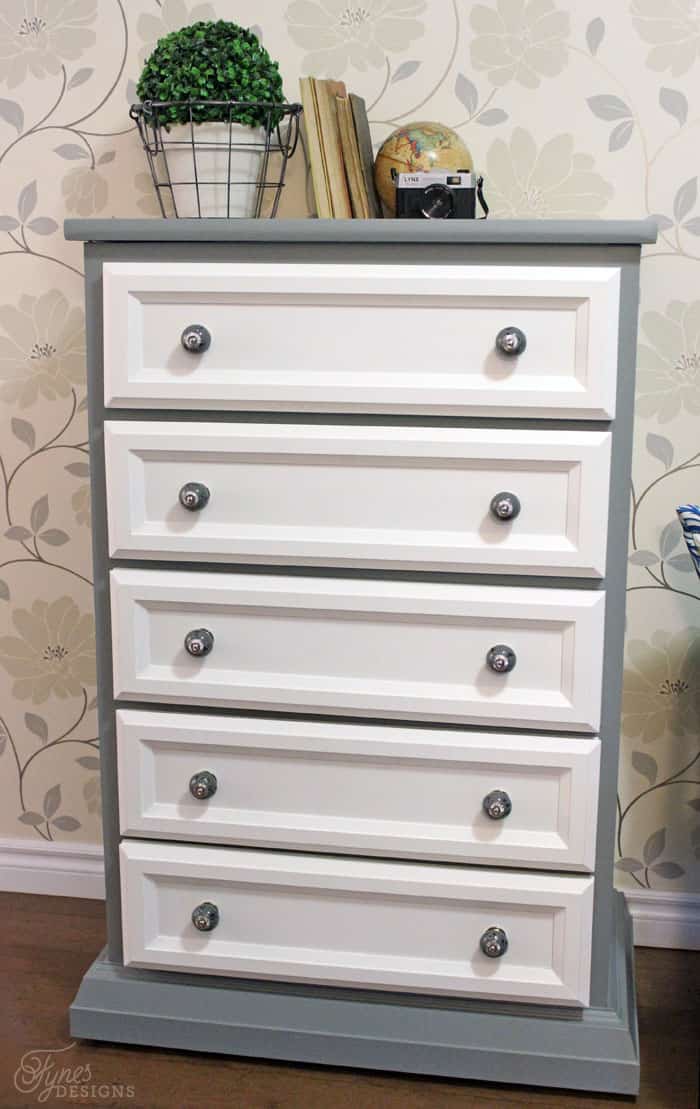
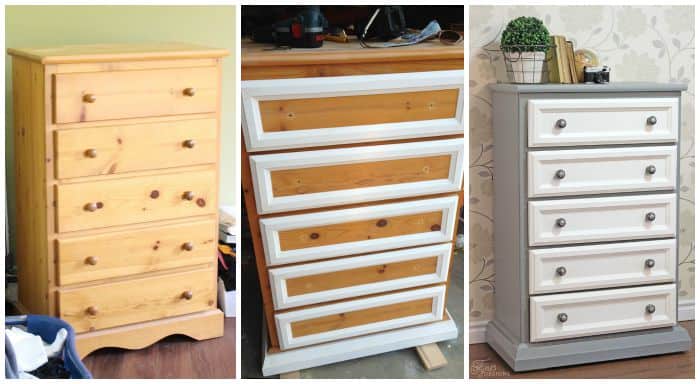
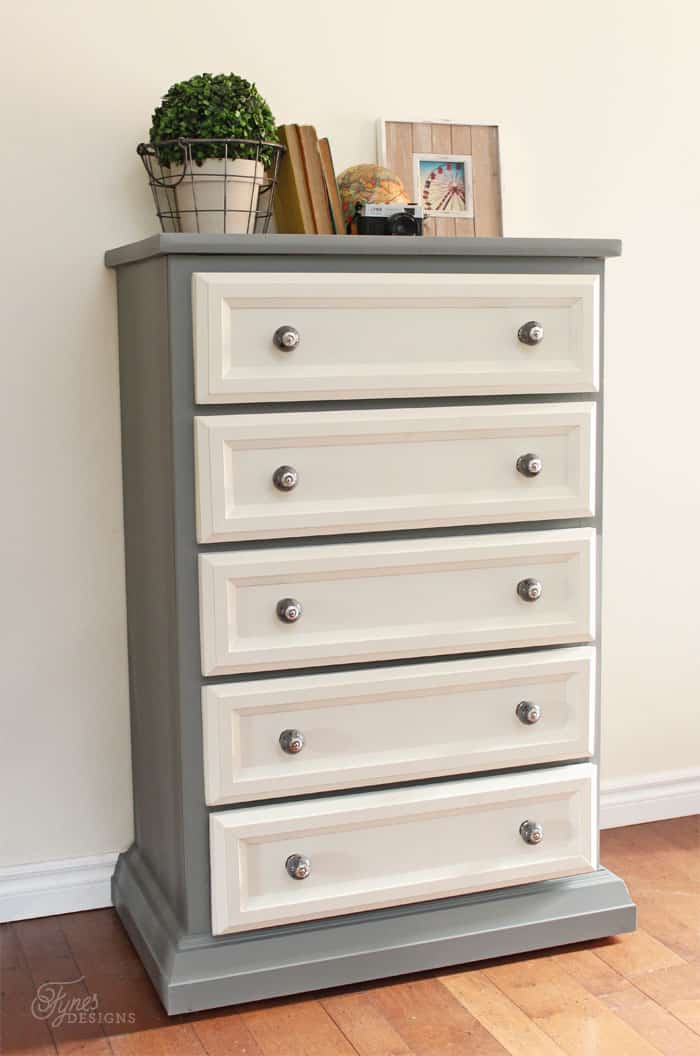
The Dresser Before and After
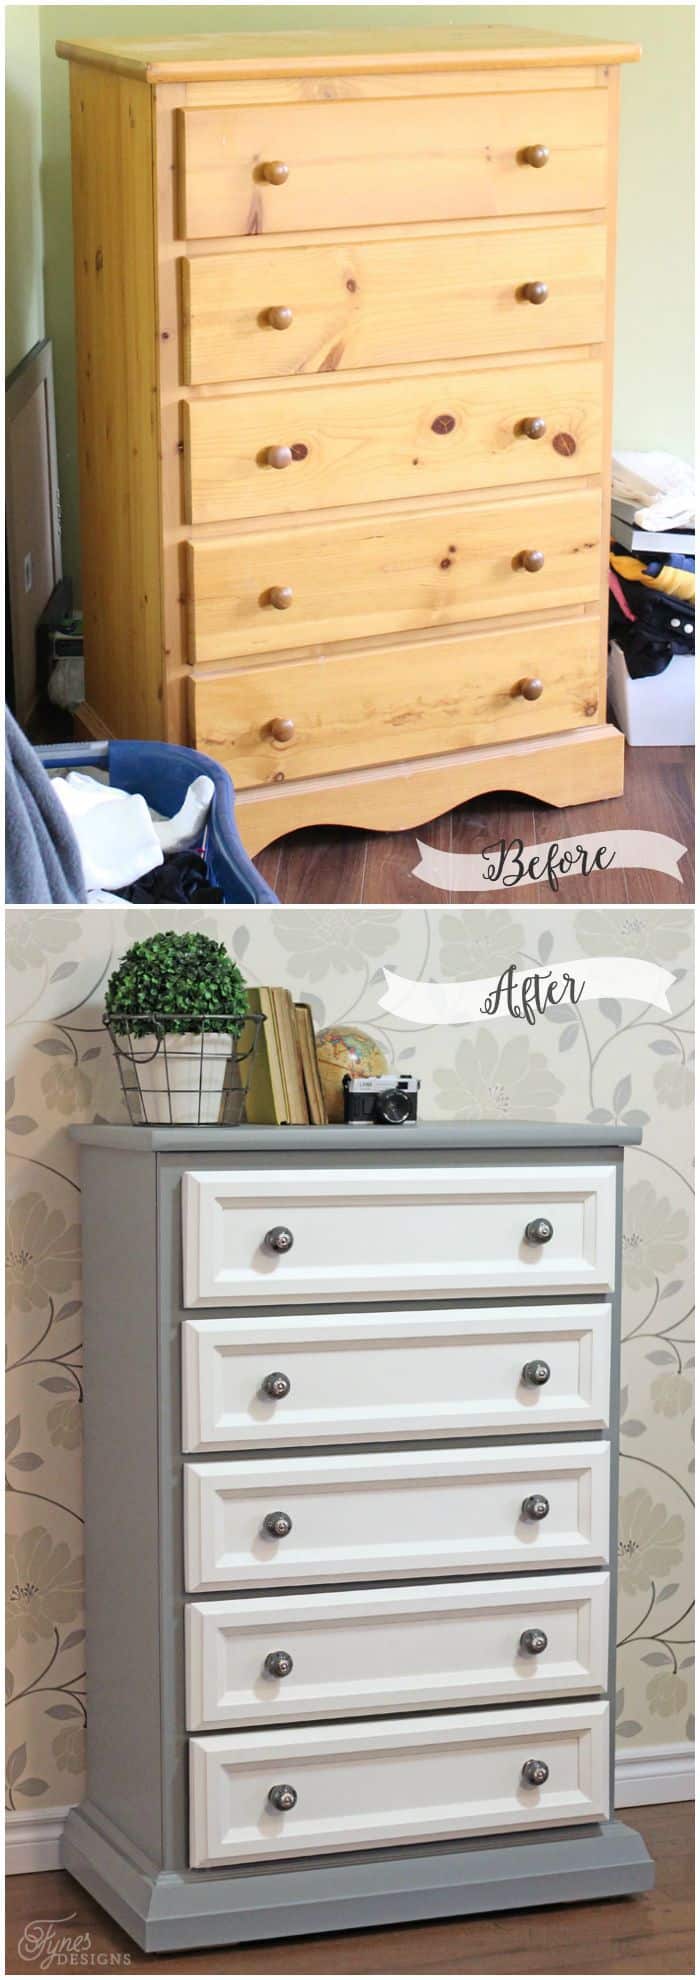
Viola finished! I just can’t believe how a bit of trim work and paint can take a boring outdated piece and bring it back to life!
FAQ
PVC trim is often more affordable than wood and is resistant to moisture and warping. However, wood trim provides a more authentic and high-end look, making it the preferred choice for furniture makeovers.
Lining your dresser drawers can help protect the interior and add a stylish touch. Consider using adhesive shelf liner, fabric, or decorative wallpaper for a custom look.
Yes! Baseboards are a type of trim used where walls meet the floor. Just like dresser trim, they add character and definition to a space or piece of furniture.
With just a bit of wood trim, paint, and creativity, you can turn a plain dresser into a stunning custom piece. What do you think? Do you have a dresser that could use a trim upgrade? Let me know in the comments!

Ready to tackle your next DIY project? Grab my Free Home Makeover Project Planner to stay organized, set a budget, and bring your vision to life. Get full details on using this planner and creating the home you’ve been dreaming of!


Holy guacamole! I love this! I just checked out the site for the trim product – very chic. You wouldn’t even know this was the same piece of furniture!
My daughter has a whole set of this pine furniture. You’re giving us some great ideas!
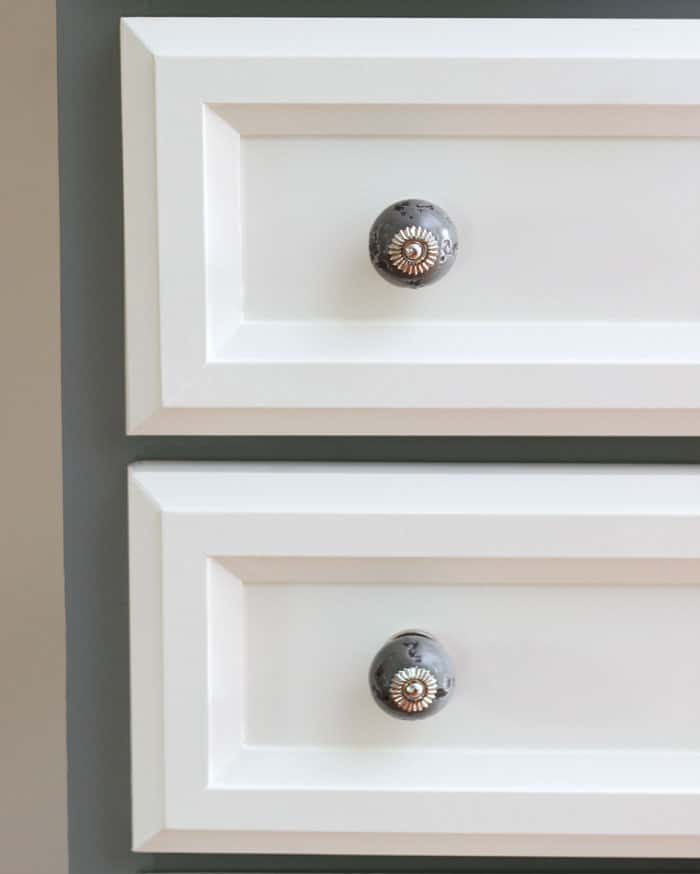
I absolutely love the rustic look of that hardware against the crisp, clean look of the dresser. So pretty!
That is so gorgeous!! I want one of the Home Right sprayers! What a beautiful upcycle!
Wow, what a transformation! It looks totally different. What a difference a little trim makes!
Great job! It looks like a million bucks!
Beautiful! And I especially LOVE those knobs!
This turned out great! I love the color choices.
Love this makeover, you definitely made it more up do date with all your changes.
Your makeover is fantastic! What a difference. The colors you chose are lovely. Thanks for sharing your awesome project on Snickerdoodle Sunday.
I Will be repainting my bedroom set (it was originally my grandmothers). So thank you for the fresh ideas. Lois.
Wow, what a great transformation. Thanks for much for the tutorial, can’t wait to try this!
Love the new look. I ‘ll be repainting my bedroom set soon, thanks for the ideas.
Gorgeous! Love how this turned out and I am obsessed with those dresser knobs! Thanks for sharing!
me too!! They are masculine and feminine all in one!
This looks amazing! Love the final product.
I love your dresser. It’s amazing what you can do with a little moulding and a little paint…pinned.
I know! i amazed myself a little!
I love this project, you did amazing! That wall paper is very neat too! I’m subscribing!
Thanks for visiting Carole, welcome aboard!
If you hadn’t shown how you how you added on the trim, I would not have guessed this being the same dresser at all.
liz @ sundays with sophie
Why pine needs a primer? I have a change table from ikea and want to add some golden paint but im to lazy and poor to buy more paint… ih wait… i just check the paint and sais does not needs primer or sanding… lucky me…
Pine really needs a primer on the knots. The sap will eventually seep through the paint and leave yellow circles
Hi there! Gorgeous transformation and I have just the piece to try with your perfect trim recommendation. I have an odd question- do you happen to have the wallpaper information that is in your final photo of your piece? Its beyond lovely! Thank you for any help!
I wanted to find a way I could use this gift-wrap where I could enjoy the pattern in my daily life instead of only wrapping gifts with it and giving it away. When I started to update my guest room I got an idea on how I could incorporate it into the room. The gift-wrap comes in 20” x 28” sheets that cost $4.00 each. I needed 3 to cover the top of my dresser and the drawer pulls.