How to Print on Watercolor Paper: A Guide & Free Printables
This post may contain affiliate links. Please read our Disclosure Policy.
If you’ve ever wondered, “Can you print on watercolor paper?”, the answer is yes! As someone who loves combining digital design with traditional art techniques, I’ve used this process of printing on watercolor paper to create unique, customized artwork. In this guide, I’ll share everything you need to know, plus offer some gorgeous free wildflower printables for you to try the technique yourself!

If you’re passionate about crafts, you might also enjoy other fun DIY projects like this free sewing pattern for a girl’s purse, or learn how to make a cozy DIY floor pillow with this step-by-step tutorial. And, if you’re looking to celebrate spring in style, check out this free printable floral card to add a personal touch to your greeting cards!

Why Print on Watercolor Paper?
Printing on watercolor paper opens up a world of creative possibilities! The textured surface gives your prints a professional, artistic quality that regular printer paper simply can’t match. Plus, when you print line art or designs on watercolor paper, you can then hand paint them to create truly one-of-a-kind pieces.
I created these wildflower printables as simple black-and-white artwork for home decor, but during some recent downtime, I experimented with printing them on watercolor paper. The results were stunning! These botanical designs transform from basic prints into custom pieces of art that look professional and personal.
Artist Tip: Watercolor paper prints make thoughtful, personalized gifts that look much more expensive than they are!
Supplies You’ll Need
To print on watercolor paper at home, you’ll need:
- Watercolor paper – I used inexpensive “kids” watercolor paper from the craft store, which is the best paper to easily feed through the printer. The professional-grade or high-quality paper is too rigid.
- A home printer – Both inkjet and laser printers work for this technique. I used my Canon inkjet printer for the examples shown here.
- Paper trimmer or scissors – For preparing the paper to fit your printer.
- Watercolor paints (optional) – If you want to add color to your printed designs.
Artist Tip: Before committing to your final design, do a test print and add a drop of water to see if the ink bleeds. Some printer inks are more water-resistant than others!

Step-by-Step Guide: How to Print on Watercolor Paper

Prepare Your Watercolor Paper
First, check if your paper will fit in your printer. Standard watercolor pads are often 9″ wide, which may require trimming to fit properly. The paper pad I used from Michael’s needed about 0.5″ trimmed off to fit my printer.
If you’re using loose watercolor paper with deckled (rough) edges, you’ll need to trim these to create straight edges that can feed through your printer smoothly. Use a paper trimmer for the cleanest cuts, or a straight edge with a craft knife or scissors will work too.
Select the Right Paper Weight
Remember that watercolor paper is typically thicker than normal paper. For best results, choose lighter-weight watercolor paper (similar to cardstock) to prevent printer jams. Many machines have “photo paper” or “heavy cardstock” printer settings that can help with feeding thicker papers.

Load Your Printer Correctly
Load one sheet at a time to prevent jams. I find it best if I remove any other copy paper in the tray to prevent additional layers of paper from being picked up. Most printers will need the watercolor paper loaded with the textured side facing down (so it prints on the textured side), but do a test print if you’re unsure.

Print Your Design
Select the highest-quality print setting for the best results. When printing line art that you plan to color, the “black and white” or “text” setting often works well.
Artist Tip: For inkjet printers, allow extra drying time before handling your prints to prevent smudging. The absorbency of watercolor paper is higher than regular paper, which can cause it to take longer to completely soak in ink and be dry to the touch.

Adding Watercolor to Your Prints
The beauty of these free wildflower printables is that they’re perfect for beginners! You don’t need to be an artist – it’s essentially “painting within the lines” for adults.
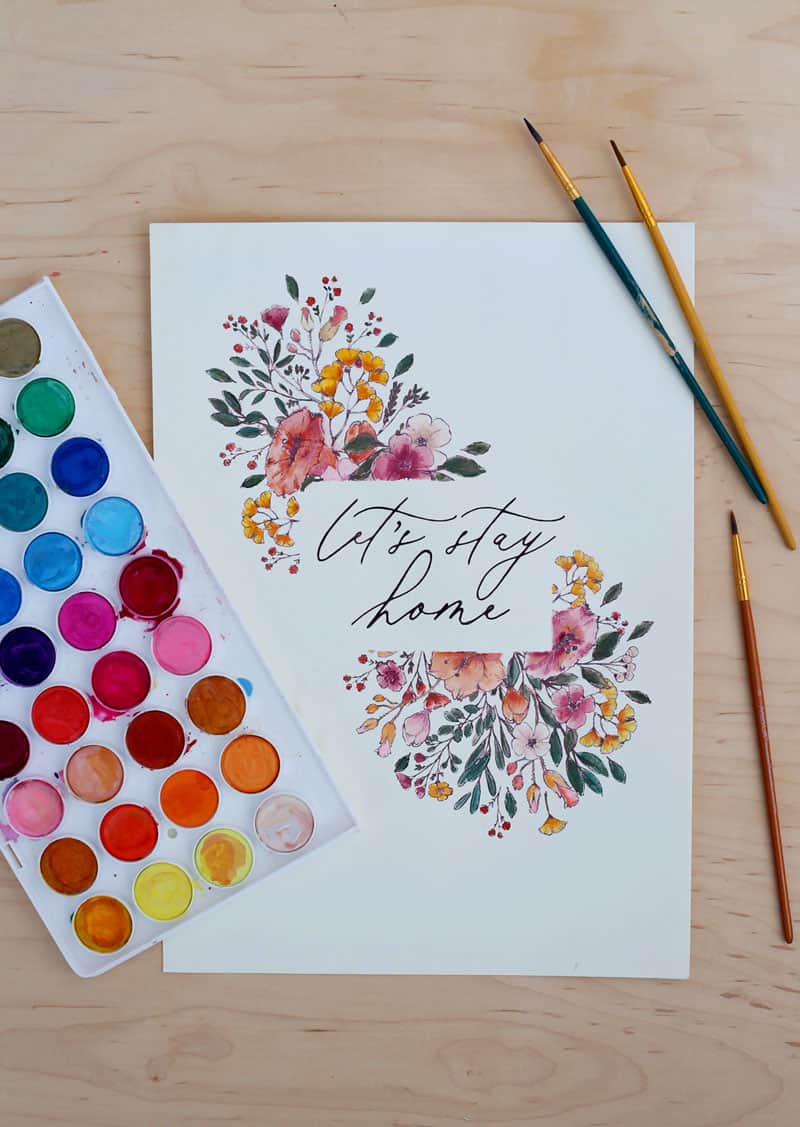
I painted my prints using warm colors in various shades of pink and yellow, but they would look equally beautiful with cool blues and purples. The outline guides make it easy to create professional-looking artwork even if you’ve never used watercolors before.
My Friend Lucy at Craftberry bush is a beautiful artist, she has lots of watercolour tutorials like this landscape watercolor tutorial to follow along with to help improve your skills.
Artist Tip: Start with lighter colors and gradually add darker shades. Watercolor is transparent, so it’s easier to darken an area than to lighten it!

Free Wildflower Printables
I’ve created four beautiful wildflower designs for you to download and try this technique yourself. Each design prints beautifully in black and white on regular media paper, but truly comes to life when printed on watercolor paper and hand-painted. The added texture makes the print a unique piece of art to customize.
Project Ideas & Display Tips
Once you’ve printed and (optionally) painted your wildflower prints, here are some beautiful ways to display them:
- Make unique gift tags
- Frame them individually or as a gallery wall collection
- Clip them to wicker baskets for a rustic touch
- Use them as greeting cards by printing on smaller watercolor paper
- Create a beautiful journal cover

Troubleshooting Common Issues
Paper Jams: If your watercolor paper jams, try:
- Trimming the paper more precisely
- Using slightly thinner watercolor paper
- Loading just one sheet at a time
- Adjusting your printer’s paper thickness settings
Ink Bleeding: If your ink bleeds when adding watercolor:
- Allow the printed image to dry completely (24+ hours)
- Use a printer with more water-resistant ink
- Try a different medium to color the images such as pencil crayons, acrylics or oil pastels
- Consider sealing your print with a light fixative spray before painting

FAQs About Printing on Watercolor Paper
Most home printers can handle watercolor paper, but the paper should be relatively thin (similar to cardstock). Both inkjet and laser printers work, though results may vary. Check your printer’s specifications for maximum paper-weight handling.
It depends on your printer. Laser printers generally produce more water-resistant prints than inkjets. If using an inkjet, allow the print to dry completely before adding watercolor, and test on a corner first.
For most home printers, 90-140 lb (190-300 gsm) watercolor paper works best. Heavier papers may cause jams.
Absolutely! While I’ve focused on black outlines for adding watercolor, you can print full-color images on watercolor paper for a beautiful textured effect.
Have you tried printing on watercolor paper at home? I’d love to see your creations! Share your projects in the comments below or tag me on social media.