15-Minute DIY Wood Caddy: Easy Beginner Décor Project
This post may contain affiliate links. Please read our Disclosure Policy.
Spring has officially arrived in my home, and I couldn’t be more excited to share this quick DIY project that’s bringing fresh life to my spaces! This simple wood caddy filled with vibrant daffodils has become my go-to decoration this season, and the best part? It took me less than 15 minutes to build!

Why You’ll Love This Project
I’m no stranger to craft quickies, like my 10-minute apron or this Vintage Inspired Sled. I challenged myself to create something both functional and beautiful without spending hours in my workshop—and this DIY wood caddy was born!
For about $10 in materials, you can create a versatile wooden carrier that works for everything from displaying fresh flowers to organizing crafting supplies, even makes a great gift for mom paired with these cute Mother’s Day Drink Tags. Let’s dive into how you can make one yourself!

How to Build a 15-Minute DIY Wood Caddy
Materials You’ll Need:
- Jig Saw
- Chop Saw (or have your lengths cut at The Home Depot)
- Brad Nailer (or small nails and a hammer)
- Wood Glue
- Paint or stain
- 1×3 OR 1×4 (depending on the desired width)
- 1×6
- 1×10
- Decorative ribbon (optional)
Designer Tip: Don’t have all these tools? No problem! Most home improvement stores will cut wood to your specifications at little to no cost. This makes the project even faster and more accessible for beginners.

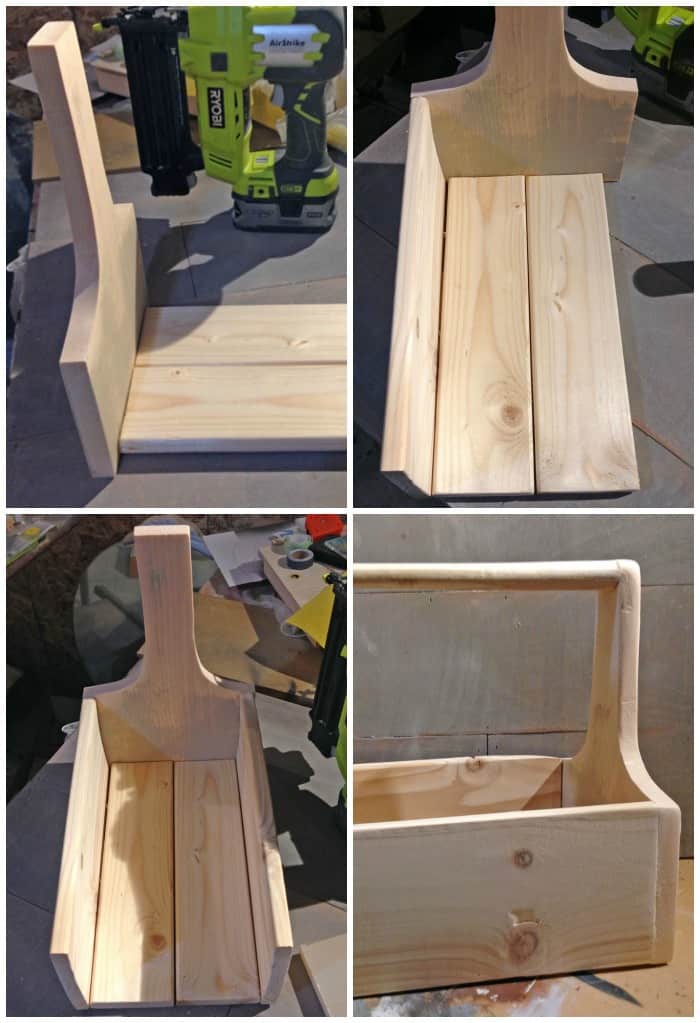
Step-by-Step Instructions:
- Create Your Template: Download and print the pattern piece for the end GET IT HERE. The pattern includes all cut dimensions. When printing, click “fill entire page”—the pattern should fill the width of your paper.
- Cut Your Wood: Cut lumber as indicated on the template. I offer two sizes of caddy—narrow and wider. I made my box 13″ long, but you can adjust the length based on your needs.
- Trace and Cut End Pieces: Trace the pattern piece twice onto the 1×10. Using the jig saw, carefully cut out both end pieces.
- Assembly:
- Apply wood glue to the seams
- Nail the bottom boards to one end piece
- Add one side at a time
- Finish with the opposite endpiece
- Slide a 1×2 between the opposing ends and nail or screw in place to create the handle
- Finish: Sand your caddy for a smooth surface, then paint or stain your desired color. I left mine with a natural wood finish to complement my spring flowers. For a personal touch, you can even stencil your last name on the side!
Designer Tip: Add a decorative ribbon around your caddy for a polished look like in the photo. The blue and white striped ribbon creates a beautiful nautical contrast against the yellow daffodils!
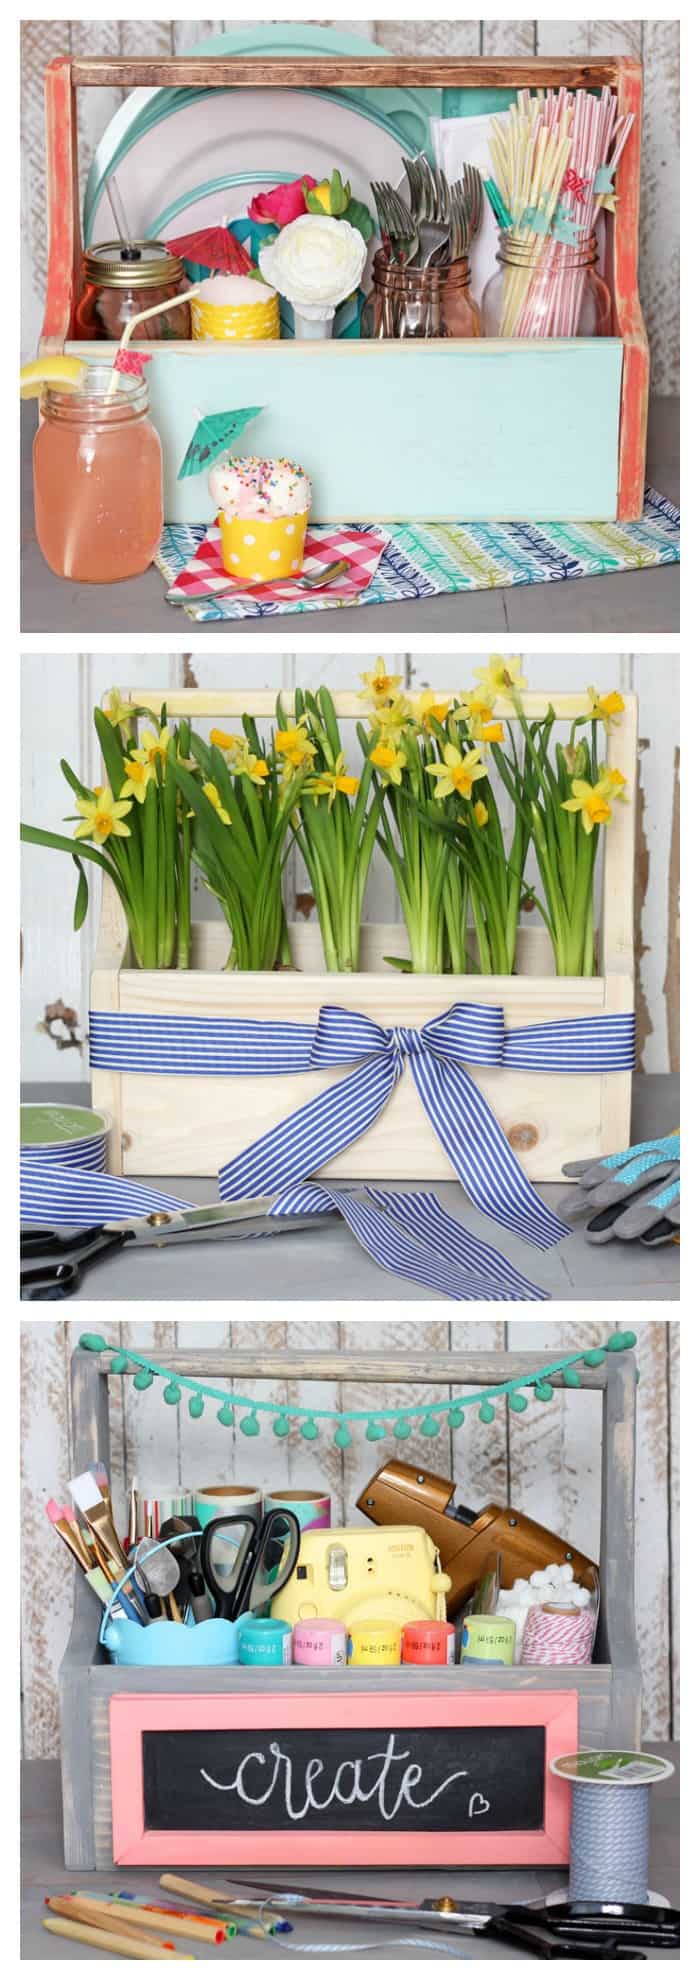
Versatile Uses for Your DIY Wood Caddy
The beauty of this project is its versatility! Here are some of my favorite ways to use a wood caddy:
- Spring Flower Display: Fill with potted spring bulbs like daffodils or tulips for an instant centrepiece. You can stencil a beautiful design on the sides like in this DIY Paint Caddy from the DIY Dreamer.
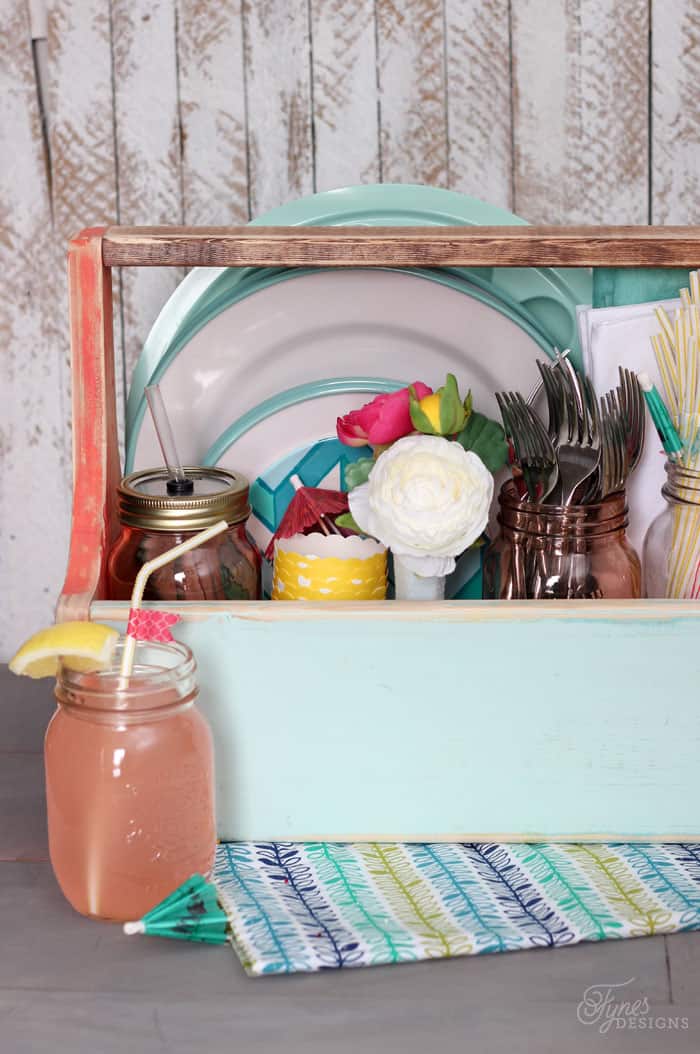
- Kitchen Organization: Store utensils, napkins, and condiments for outdoor dining
- Cutlery Caddy: Keep forks, spoons, and knives organized for everyday use or special gatherings
- Condiment Caddy: Perfect for holding ketchup, mustard, and other sauces during backyard BBQs
- Bathroom Storage: Organize toiletries and hand towels
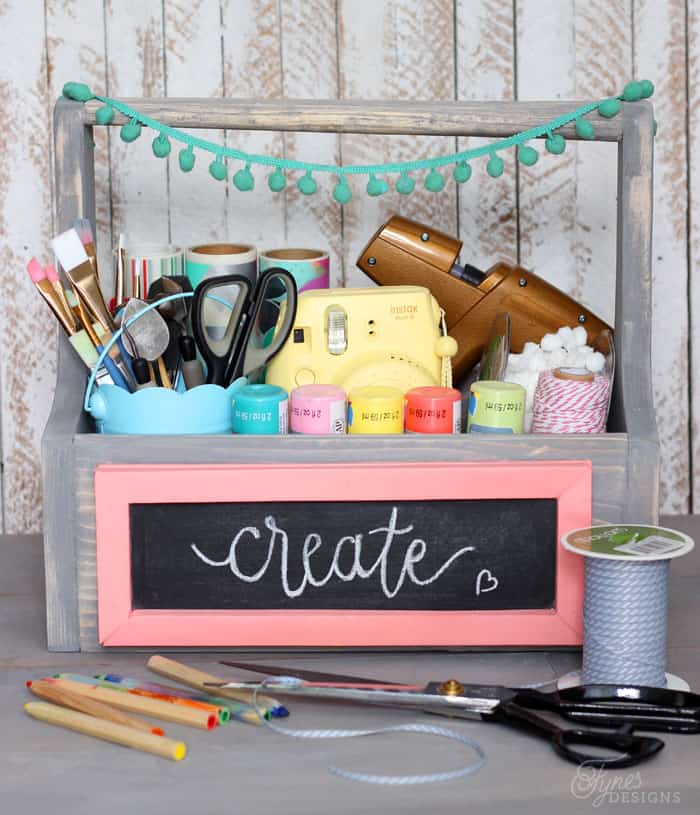
- Office Helper: Corral pens, notebooks, and office supplies
- Gift Presentation: Fill with goodies for a unique, handmade gift basket
Designer Tip: If using your caddy for fresh flowers like in the image, consider adding a plastic liner or mason jars inside to protect the wood from water damage. Add small compartments using additional pieces of wood to separate forks, spoons, and knives for a cutlery organizer.
Why This Project Works So Well
What I love most about this wood caddy is how it brings warmth and handcrafted charm to any space while providing exceptional durability. The natural wood element grounds your décor while allowing whatever you place inside to shine. When filled with bright yellow daffodils and adorned with a simple striped ribbon as shown in the image, it creates the perfect balance of rustic and refined.
Creating Compartments for Extra Functionality
Want to enhance your wood caddy with compartments? It’s simple to add dividers that transform your basic caddy into specialized storage for cutlery or condiments:
- Sand all edges for a smooth finish
- Measure and cut small pieces of thin wood to create divider walls
- Apply wood glue to the bottom and sides of each divider
- Position dividers to create sections for forks, spoons, and knives
- Secure with small brad nails for extra durability
FAQs About DIY Wood Caddies
Absolutely! This project requires minimal cuts and simple assembly. If you’re new to woodworking, this is an ideal starter project.
Line your caddy with plastic, use waterproof sealant inside, or place flowers and condiment bottles in separate containers within the caddy.
Pine is affordable and easy to work with, but cedar is naturally weather-resistant if you plan to use your caddy outdoors. Oak provides the best durability for everyday use items like cutlery organizers.
Definitely! The 13″ length I suggest works well for most purposes, but you can adjust the dimensions to fit your specific needs. Add compartments of different sizes depending on whether you’re storing forks, spoons, knives, or other items

Let’s See Your Creations!
I hope this quick DIY wood caddy brings as much joy to your home as it has to mine. If you make one, I’d love to see how you’ve used it! Share your photos in the comments below or tag me on social media. Don’t forget to showcase how you’ve personalized it with your last name or family monogram!
Remember, sometimes the simplest projects make the biggest impact in our homes. Happy crafting!
Fantastic, as always!
This is so adorable, love it with the daffodils, it looks so gorgeous! And I could see using this on my desk, with a few flowers, pens, scissors, etc. Perfect!
So happy you like them Nikki! They are pretty and functional!
So pretty and I love all the different designs! Thanks so much for linking up with #ShareTheWealthSunday!
xoxo
Lisa
Oh this is so lovely. I have really enjoyed gardening this year. Thanks for sharing with Small Victories Sunday linkup. Pinned to our linkup board. Let me know which posts you enjoyed from our linkup and they may get a special feature!
This turned out so cute! I love crates like this and the possibilities of decorating it are endless. Thank you so much for linking up at Totally Terrific Tuesday! I am thrilled to have you around!
Jess
Hi Virginia, pleased to meet you, this is my first time to your blog and thank you for introducing me via Friday Features on my blog, this week.
I love your project, I thinkm y fav is the utensils caddy, I would use that for outdoor meals.
You have so many ideas, I would love to have you share weekly, Wordless wed and Friday Features.
Hope you have a great weekend, Karren
oxo
Thanks so much for stopping by Karren, a pleasure to meet you!
I love this caddy and the fact that you can use it in so many different ways. Thanks for sharing your great tutorial with Share It One More Time. Cathy
I adored this project! So neat. I love all the different versions you made. Just wanted to let you know that it is being featured at this week’s link party! http://www.thelifeofjenniferdawn.com/2015/05/a-little-bird-told-me-link-party-141.html
Excited to feature you on A Little Bird Told Me Link Party!
Very cute! Thanks for sharing at the #HomeMattersParty. Hope to have you party with us again Friday.