How to Make a DIY Leather Key Holder in 10 Minutes
This post may contain affiliate links. Please read our Disclosure Policy.
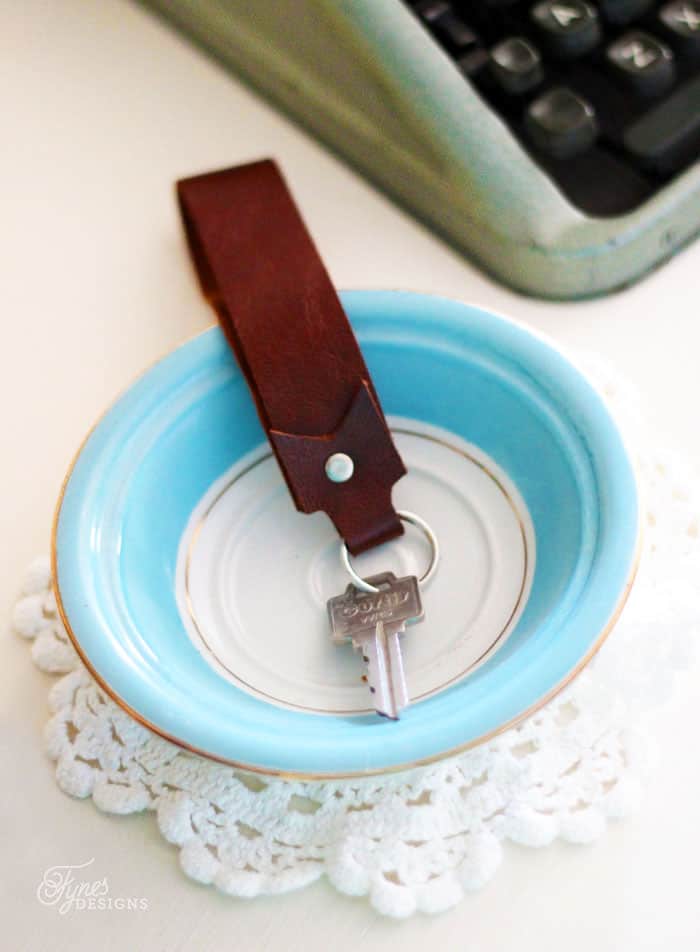
Looking for a stylish way to organize your keys? This simple DIY leather key holder project is the perfect solution! Not only is it practical, but it adds a touch of handcrafted elegance to your everyday carry essentials. Best of all, you don’t need any specialized leatherworking skills or equipment to create this beautiful leather key fob.

Why Make Your Own Leather Key Holder?
If you’re like me, you’ve probably accumulated a collection of plastic keychain fobs or flimsy metal rings that just don’t stand the test of time. A handmade leather key holder not only looks more sophisticated but also becomes more beautiful with age as the leather develops a rich patina. Plus, making your own allows you to customize the size, color, and style to match your aesthetic.
Looking for more leather project ideas? Check out my 10 project ideas for leather scraps to get inspired!
How to Make a No-Sew Leather Key Fob
This simple leather key holder project can be completed in just 10 minutes with basic supplies. The best part? No sewing machine or complicated stitching required!
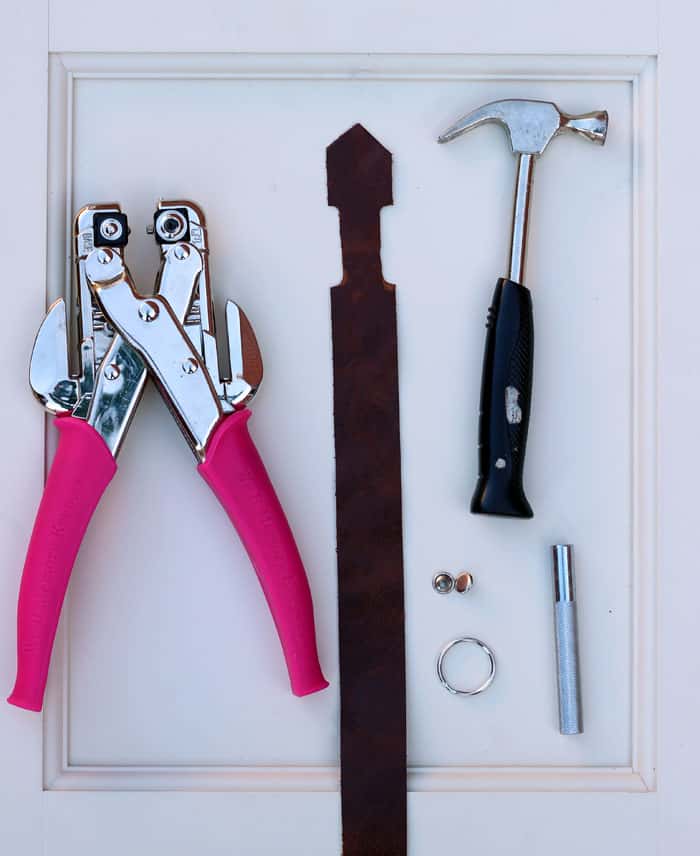
Supplies You’ll Need:
- A strip of leather measuring 1″ wide by 12″ long
- Scissors
- A hammer
- Leather rivet kit (available at craft stores like Michaels)
- A leather hole punch (I use a Crop-a-dile)
- Key ring
Step-by-Step Leather Key Chain Instructions:
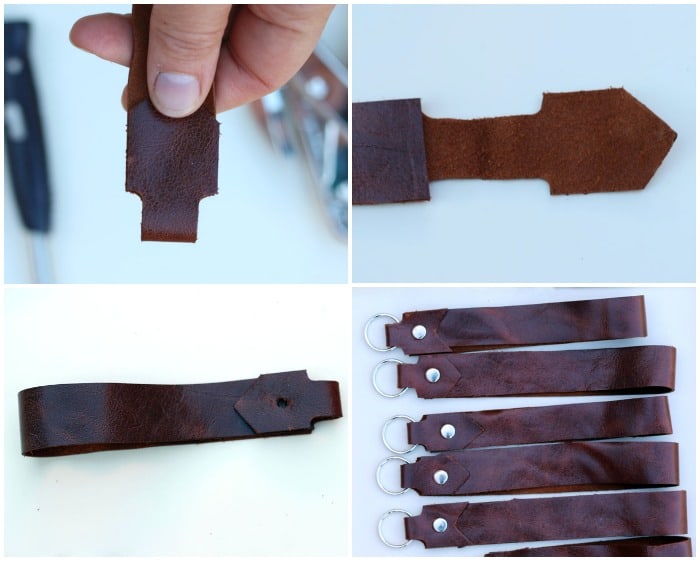
- Cut your leather to size. If you’re starting with a larger piece, measure and cut a strip that’s 1″ wide by 12″ long.
- Shape the end. Fold down 2″ from one end of your leather strip. With scissors, cut an ‘L’ shape from both sides of the fold. Then, cut the tip of the leather into a point or flag shape by folding the tip in half lengthwise and snipping off the corner.
- Create the fold. Fold the opposite end up to meet with the bottom edge of your ‘L’ notch.
- Complete the sandwich. Fold the small end over, sandwiching the square end between the layers.
- Punch a hole. Use your hole punch to create a hole through all three layers of leather.
- Insert the rivet. Place the male side of the leather rivet through the hole and position the female side on the opposite end.
- Secure the rivet. Place the rivet on a hard surface and use your hammer with the included setter tool to bang the rivet closed.
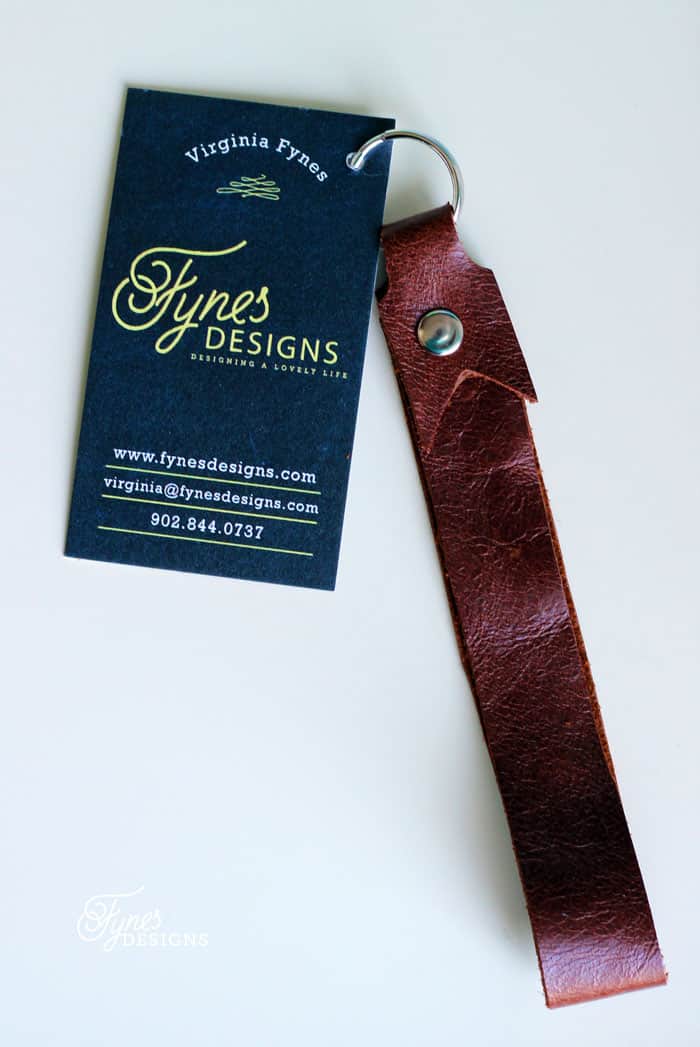
- Add the key ring. Slide on your metal key ring, and your leather key holder is ready to use!
Pro Tips for Your Leather Key Holder
- Make it a gift! These leather key holders make wonderful handmade presents for friends and family.
- Choose quality leather for the best results. Full-grain or top-grain leather will be more durable and develop a beautiful patina over time.
- Consider leather conditioning to protect your key holder and keep it supple.
- Experiment with different leather colors to match your everyday style or create several for different sets of keys.
More Leather Projects You’ll Love
Once you’ve mastered this simple leather key holder, why not try your hand at other leather accessories? My leather camera strap and leather corner zipper pouch tutorials are perfect next steps in your leatherworking journey!
FAQ
Vegetable-tanned or chrome-tanned leather in the 2-4 oz weight range works perfectly for this project. Thicker leather might be too bulky when folded, while very thin leather may not be durable enough.
Absolutely! Consider adding stamped initials, using leather dye for color, or even attaching decorative studs for personalization.
With proper care, your handmade leather key holder can last for many years. Quality leather actually improves with age as it develops a beautiful patina unique to how you use it.
Absolutely! A keychain or key holder makes an excellent gift for several reasons. First, it’s practical – everyone uses keys and needs a way to keep them organized. Second, a handmade leather key holder adds a touch of personalization that store-bought options can’t match. It’s also a gift that will be used daily, serving as a constant reminder of your thoughtfulness. For housewarming gifts, new car purchases, or milestone celebrations like graduations, a quality leather key holder is both meaningful and functional.
A keychain often symbolizes trust, security, and connection. When you give someone a keychain, you’re acknowledging their responsibility and the important things they have access to – whether that’s a home, vehicle, or workplace. In many cultures, keys represent new beginnings and opportunities, making key holders perfect gifts for life transitions. A handcrafted leather key holder, in particular, symbolizes quality, thoughtfulness, and care, as you’ve taken the time to create something durable and beautiful that will protect their important keys.
Ready to Show Off Your New Leather Key Holder?
I’d love to see your finished leather key holders! Tag me on social media or leave a comment below with a photo of your creation. Have you made any modifications to the design? Let me know what worked for you!
Don’t forget to check out my other leather crafting tutorials for more inspiration, and sign up for my newsletter to be the first to know about new DIY projects.
What a very cool project! Can’t wait to meet you at BlogPodium! Only two more days!! 🙂
Another fantastic idea. I’d love to have one of those new fancy cards! Have a great time in To. 🙂