Wooden Hope Wreath Sign – Creative Easter Sign Ideas
This post may contain affiliate links. Please read our Disclosure Policy.
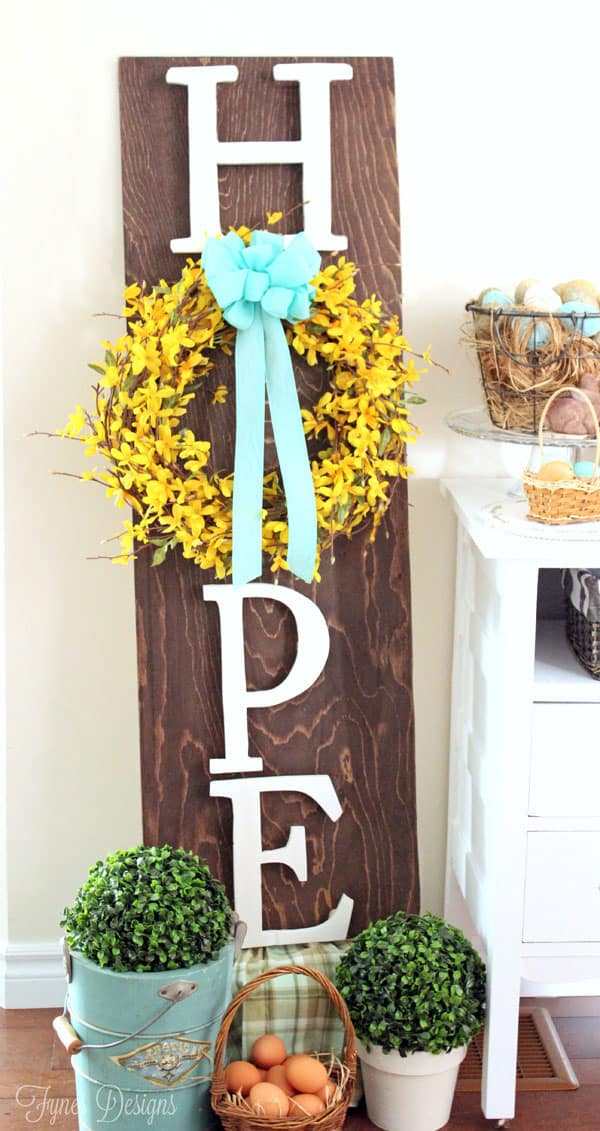
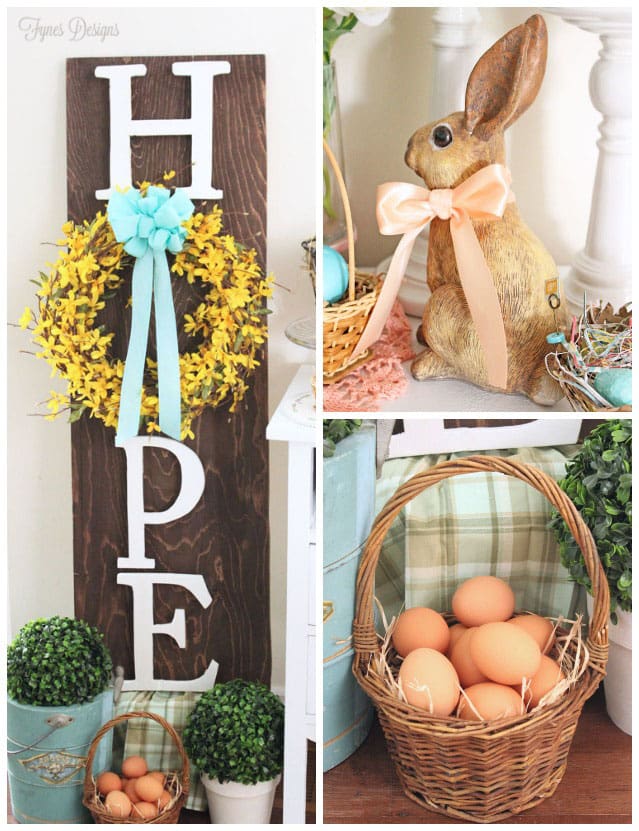
Looking for unique Easter sign ideas to welcome spring? This Wooden ‘Hope’ Wreath Sign is the perfect way to combine rustic charm with the uplifting spirit of the Easter holidays. With its meaningful message and simple yet elegant design, this DIY project has a beautiful festive touch.
This project is not only meaningful but also easy to make and looks stunning as part of your spring decor. If you’re looking for more easter decor ideas or inspiration for spring wreaths, check out my DIY Spring Wreath tutorial here or this creative Dollar Store Easter Basket Wreath. For something extra festive, don’t miss my Easter Chick Wreath or the Happy Easter wall hanging. Follow along to see how you can bring hope and beauty into your Easter decor with this lovely wooden wreath sign!

The Meaning Behind The ‘Hope’ Symbol In Easter Celebrations
I had a chat with our Pastor to brainstorm easter sign ideas and phrases that would be suitable. He suggested the word Hope—a perfect fit for the Easter season. As he explained, “The Easter message is: Good Friday—all hope seemingly lost as Christ goes to the cross and dies. Easter Sunday—hope regained as Jesus conquers death and sin through his resurrection.”
Materials Needed For A ‘HOPE’ Easter Sign
- Wooden Board: 1″ x 12″ x 4′ Common Board
- Wooden Letters: “H,” “P,” and “E” to match the size of your board. (My Letters were hand-cut from MDF)
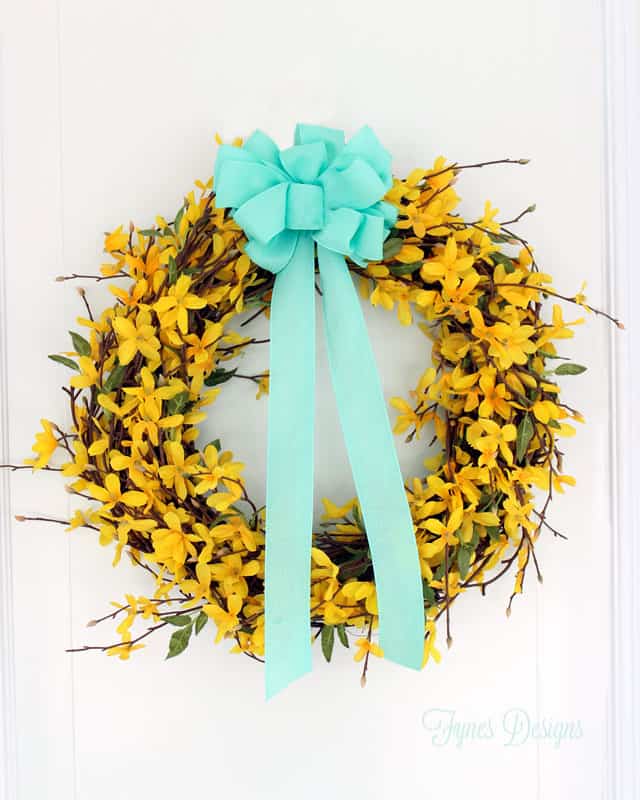
- Small Grapevine Wreath: To serve as the “O” in “HOPE.”
- Faux Forsythia Branches: For decorating the wreath (or other faux flowers of choice)
- Florist Wire: To secure decorations on the wreath.
- Ribbon: For decorating the wreath
- Wood Stain or Paint: For finishing the board and letters.
- Sandpaper: To smooth the board’s surface.
- Hot Glue Gun and Glue Sticks: For attaching decorations.
- Nails and Hammer or brand nailer: To affix the wreath to the board.
Step By Step Instructions For Making The Wooden Hope Wreath Sign
Painting And Distressing The Wooden Frame:
- Sand the wooden board to remove any rough edges. Optional to leave it distressed for a more farmhouse look.
- Apply your chosen stain or paint to the board and letters; allow them to dry completely.
Decorate the Easter Wreath:
- Trim the faux forsythia branches into smaller sections.
- Bend each branch to match the wreath’s curve.
- Secure the branches to the wreath using florist wire, ensuring even distribution.
- Optionally, add a ribbon to the wreath in a color that coordinates with your decor.
Creating The Word “Hope” With Wooden Letters:
- Arrange the letters “H,” “P,” and “E” on the board, leaving space for the wreath as the “O.”
- Attach the letters to the board using the brad nailer or small nails. To make the letters stand off the signboard, I used small blocks of wood as a spacer.
- Position the decorated wreath in place of the “O” and secure it by either hanging it on a small hook or nail or, for extra stability, wrapping florist wire around the wreath and nails above and below its position.
Finishing Touches:
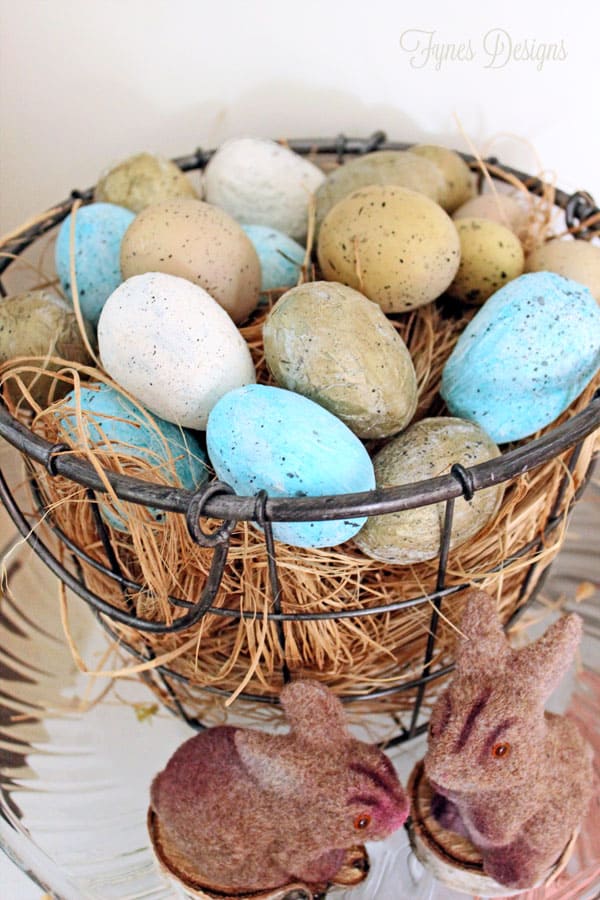
For a festive look, consider adding Easter-themed decorations such as bunny ears, small chickens, or a bird’s nest. You can use moss, twine, and spring flowers like tulips and daffodils, easily found at your local craft store, to create vibrant, textured embellishments. Incorporating different colors will give your wreath a cheerful, personalized touch that perfectly captures the essence of the season!
Ideas For Displaying The Sign In Different Areas Of Your Home
The wooden HOPE Easter wreath sign is a versatile piece that can brighten up any area of your home. Lean it in your entryway to welcome guests, display it beside your living room mantel as a festive focal point, or use it to create a vignette in your dining room to complement your Easter table décor. If hanging a wreath on your front door isn’t an option, then this sign makes a charming alternative for your front porch, adding a fresh look to your outdoor space. Its vibrant colours and seasonal details make it a delightful addition wherever you choose to showcase it!
Other Creative Easter Sign Ideas To Try At Home
Looking for more inspiration to add festive charm to your Easter décor? Try making an adorable Easter Chalkboard Bunting from Clean and Scentsible for a customizable touch. In addition, you craft a whimsical DIY Easter Sign like the one shared on Creating Through Chaos, or explore the colorful and creative options in this Easter Decor Sign Collection. For something a little more rustic, check out the 2×4 Bunny Blocks tutorial from I Should Be Mopping the Floor or create a charming Standing Bunny from Reclaimed Pallet Wood with Kippi at Home. For even more ideas, take a peek at my Easter Pinterest Board, packed with seasonal inspiration for every style!
FAQ
To create a charming Easter display, start with a centerpiece that celebrates the arrival of spring. Arrange spring blooms like tulips or daffodils in a decorative vase, adding some twigs for texture and height. Scatter colorful Easter eggs around the base for a festive touch. Incorporate greenery to add natural elements that bring the display to life. A nod to childhood favorites like Peter Rabbit can add whimsy—consider figurines, storybook elements, or themed linens. Combine these elements to craft a vibrant, layered arrangement that captures the joy of the season!Can easter eggs be recycled?
If you’re wondering what crafts you can make for Easter, there are plenty of creative ideas to try! From decorating colorful Easter eggs to crafting festive wreaths, you can find inspiration on my Easter Crafts and Decor page. Try making DIY bunny-themed decorations, creating vibrant Easter centerpieces, or designing cute treat holders for kids. Whether you’re looking to brighten your home or create memorable gifts, these fun and easy crafts are perfect for celebrating the season!
Decorating your door for Easter is a fun way to welcome the season! Hang a festive Easter wreath featuring colorful eggs, greenery, and spring blooms like tulips or daisies. Add a touch of whimsy with a bunny-shaped door hanger or a cheerful “Happy Easter” sign. For a unique look, drape a garland of pastel-colored ribbon or felt carrots around the doorframe. These simple touches will make your door a delightful nod to the arrival of spring!
In conclusion, adding a Wooden Hope Wreath Sign to your Easter decor is a meaningful way to embrace the season. This DIY project, with simple materials and easy instructions, will bring a touch of hope and charm to your home, celebrating Easter and the arrival of spring.
Thanks for hopping by to check out my Hope Easter Wreath Sign. Keep hopping and leaving some love—there’s a stunning lineup of Canadian Easter projects waiting for you!
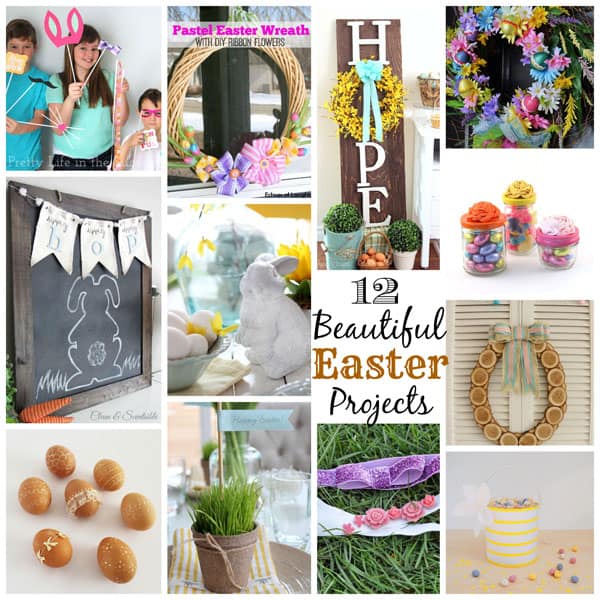
- DIY Easter Photo Props by A Pretty Life in the Suburbs
- Pastel Easter Wreath with DIY Ribbon Flowers by Echoes of Laughter
- Hippity Hop Wall Art by Clean and Scentsible
- Pottery Barn Inspired Easter Bunny by Craftberry Bush
- Ribbon Rosette Candy Jars by The Sweet Escape
- Wood Slice Easter Wreath by The Happy Housie
- Decorate Easter Eggs with Paint and Ribbon by The DIY Dreamer
- An Easter Tablescape with Peat Pots by Satori Design for Living
- Simple and Spring-y Easter Headbands by Suburble
- An Upcycled Easter Basket by Northstory


It’s gorgeous…gorgeous…Easter is the message of hope. 🙂 xo
…..its lovely and refreshing to see the Easter message celebrated so beautifully! Thank you.
What an Easter set up! I really love the simplicity of your wreath and such a unique idea to use it as a letter.
Like your Christmas one, this is gorgeous. The word HOPE is very fitting for Easter! Love the yellow and blue and the way you styled it all. Great job!
This is beautiful V! I love the HOPE for Easter…it’s perfect. Have I mentioned how endlessly talented you are!!
I am often inspired when I read a blog but it isn’t often that I am touched. With your wonderful writing and photographs I am both. I am always so impressed with your creativity and I so enjoyed reading the story behind how you came to crete such a beautiful piece. Thanks for the advice about just picking up the letters at Michaels. Power tools and I are not a good mix!
HOPE is a word we have to have here in Nova Scotia this year! Here’s hoping spring will come soon! I’m heading down to the basement to find my Easter decorations. You have inspired me!
I know! #springwhereareyou!!
Virginia, you are the queen of amazing wooden projects and your vignettes are so, so pretty! You are so talented in everything you do! I am so inspired to create an Easter vignette for my house! Have a lovely weekend! Angie xo
You’re so sweet Angie, thanks for stopping by!
SO pretty! I love it-especially with the yellow wreath.
You cut your own letters??? Damn girl that is impressive. I just mastered using a drill last year. Beautiful work as always!
I love this, Virginia! You cut your own letters with a jigsaw?!? Whoa, lady. That’s serious. I love everything about your vignette – especially the “poop spatter!” 😉
So I’m thinking you need to make a sign like that for me! LOVE IT!!! Pinned!!!
I LOVE this Virginia! The HOPE sign is perfect and I love it with the forsythia wreath- yellow Forsythia is my favourite first hint of Spring! Pinning:)
I absolutely LOVE this!!! It’s so pretty and styled so beautifully. I think your Christmas sign was what helped me find your blog! 🙂
Hey Girl! It’s Deonna from the Child at Heart blog. I was just stopping by to say hello! This HOPE sign is so happy and cheerful. That yellow is so fun! Love it. Pinning! I am doing a great spring necklace giveaway and would love for you to come by and enter to win 🙂 Have a joyful week!
http://www.thechildatheartblog.com/2014/04/spring-statement-necklaces-from.html
Virgina – i would love to make this for RELAY 4 LIFE. Can you tell me how you attached the letters and reef?
Hi Sydney, THe letters are attached with screws going from the back side. There are small wood blocks between the letters and the sign to hold the letters away from the sign. Hope this helps, I’d love to see it when you’re done!
Thank you! Can’t wait to get started. I will pin my picture.
Virginia. Thanks for the amazing idea. Mine did not come out quite as good as yours but non the less it will go at Relay 4 Life.
Thanks for sharing this wonderful HOPE sign! I’m so inspired that I made one… a little different, but I’m so thankful for the inspiration. I’ll be posting my sign next week, 3/18/2015. If I remember, I’ll send you the link. thanks again! Liz from http://www.HometoCottage.com
I’m so happy to hear you used the idea! I can’t wait to see your version!
Here it is! My finished post about the HOPE sign I made, inspired by yours. Thanks again for sharing yours. Liz http://www.hometocottage.com/2015/03/18/easter-hope-sign/
I’m late to the party but oh my goodness I love your hope sign so much! I must make one! Do you mind telling me the height of each letter & the diameter of the wreath? I absolutely love it. You are so talented! I think I’m also going to paint 4 Mason jars and stencil the letters onto each jar into a design that’s similar & give them as gifts. (To be used as vases.) After experiencing a very hard year & my Mom just recently being diagnosed with cancer, it’s the perfect word & ive been trying to figure out how to incorporate more Christ centered easter decor. It is perfect. Thanks for the inspiration!
Thank you so much Kendra. The wreath was 12″ and its now put away but I’d say the letters were approx 10″ high. Your idea sounds great!