Easy Picture Frame Ornament Craft for Personalized Gifts
This post may contain affiliate links. Please read our Disclosure Policy.
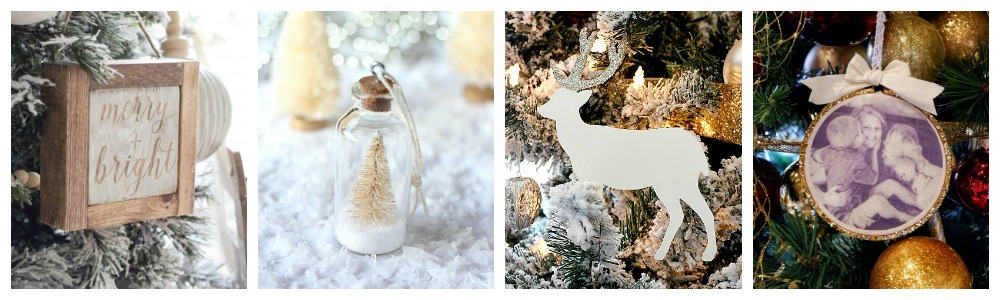
This DIY Christmas Photo Ornament Craft is incredibly easy to make and requires no fancy tools or materials—just some basic craft supplies! With a few simple steps, you can transform your cherished memories into beautiful photo ornaments that will decorate your tree or serve as thoughtful gifts for loved ones. Get ready to add a personal touch to your holiday decor and create lasting memories with this fun and creative project!
This post may contain affiliate links. For more information, please see our disclosure policy.

I’ve created glass bulb photo ornaments in the past, which are quite popular, but they require more time, planning, and patience. In contrast, these easy Christmas craft photo ornaments can be whipped together in just minutes—yes, minutes! With simple materials and minimal skill level required, they make the perfect gift or addition to your Christmas tree frames. If you’re looking for a beginner photo ornament craft, check out this keepsake photo ornament idea using coasters.
Table of contents

Supplies to Make a Picture Frame Ornament Craft:
- Heavyweight, tight weave fabric. Muslin is what I prefer
- 4″ embroidery hoops
- printable heat transfer material
- Scissors
- hot glue gun
- Ribbon of choice (I used this and this)
- Iron or Mini Heat Press
- Craft Paint and paintbrush
- Craft embellishments (glitter bells etc.)

Choose Your Photos
Choose images that fit the 4″ embroidery hoop ratio for your Christmas tree picture frame ornaments. Consider family photos, precious moments of your kids, or fun snapshots of the kiddos with their grandparents or friends to capture those cherished memories. Just be mindful that the circular shape of the frame will cut off the edges if the image is too large.

Choose Your Fabric
These DIY Christmas ornaments are a fantastic way to utilize scraps of plain white or off-white fabric. If you don’t have any scraps on hand, I recommend using heavyweight, tightly woven fabric like muslin. This affordable material not only works beautifully but can also lend a rustic charm to your ornaments, giving your precious memories a nostalgic touch, depending on the quality you choose. It’s a perfect blend of functionality and style for your holiday crafting!
How to Make Circular Photos Using Canva
- Fill the page with five circles, as shown below. When printed, these will nearly fill the hoops.
- Print circular images that fit the 4″ embroidery hoops.
- Use Canva for an easy design process. If you haven’t used it before, it’s super simple—be sure to check it out!
- Choose the US Letter template for a standard 8.5 x 11″ page.
- Select “Elements” in the left toolbar, then choose “Frames” and scroll down to find the circles.

- Upload your photos by selecting “Uploads” from the toolbar. Once uploaded, drag and drop each photo into the circles.
- The photos will automatically crop to fit the circle.
- To resize the images, click on “Crop” and adjust as needed.
- Use the “Filter” button to change the photo to black and white if desired.

- Once all your circles are filled with photos, add text, dates, or shapes to each image.
- Save your project to your computer.
- Print your design on heat transfer paper.
- Be sure to mirror the image when you print, especially if you are using text.

Choose your Picture Frame
You can easily change the style of the ornament by selecting a different frame for the project. Embroidery hoops come in multiple shapes and finishes. If you want to be creative you can purchase the basic hoops and embellish them as desired with paint, stain, glitter or ribbon.
TIP: If you choose to paint the hoop, do this before you begin. if you choose to glitter the hoop, do that once it is assembled.
Iron Photo On The Fabric
Now you’re all set to create your DIY Photo Ornaments in just a few simple steps!

- Cut a square of fabric approximately 4″ larger than the hoop and iron it to remove any wrinkles.
- Cut out one of your printed photos using scissors.
- Center the photo on the fabric square and iron it in place, following the package instructions.
- Peel the protective backing from the ironed-on photo.
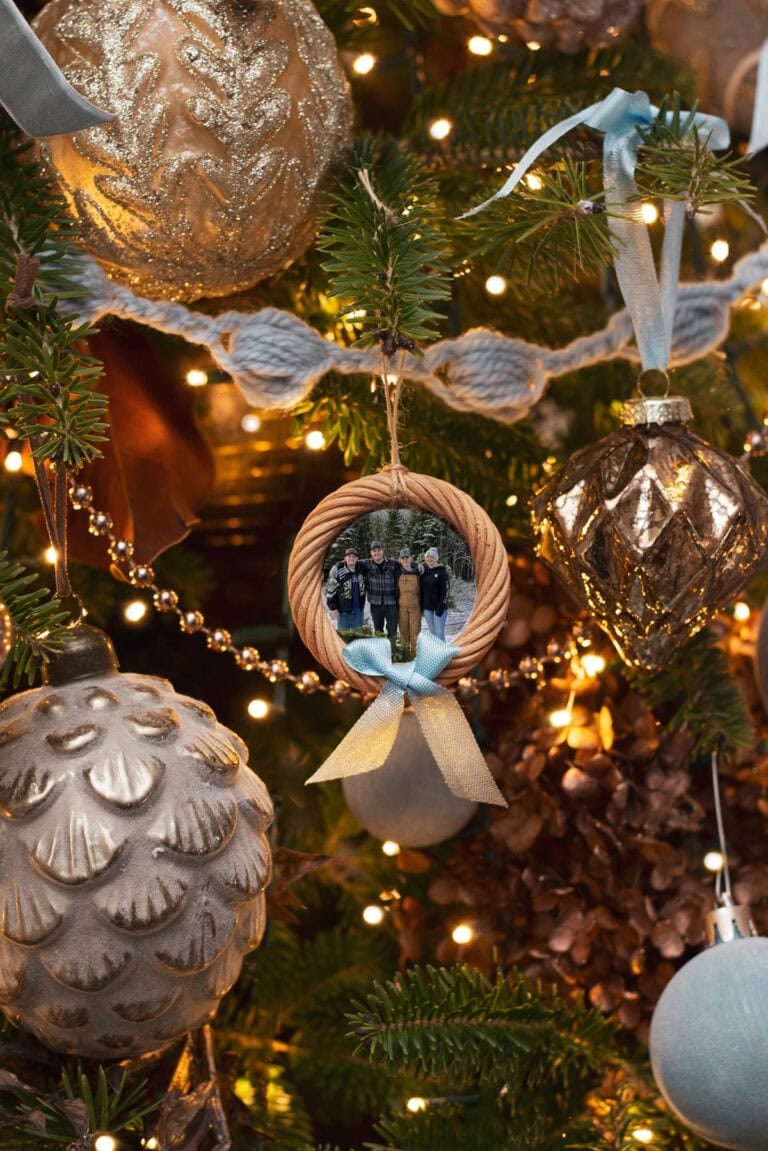
- Place the smaller hoop behind the image and the larger hoop on top, then secure the screw.
- Trim the fabric, leaving enough overhang to hot glue to the backside of the hoop.
- Flip to the back side and hot glue a light bead to hide the raw edge.
- Attach ribbon, bows, or other decorations to the top of the hoop.
- Hang your ornament on the Christmas tree!
Embellishing the Picture Frame for a Personal Touch
To finish off your Christmas Photo Ornament, adding ribbon for hanging is a delightful touch. Choose a festive ribbon that complements your ornament and cut a length long enough for a comfortable hang. Tie it into a loop or a decorative bow, and attach it to the top of the ornament using hot glue or by securing it through the hoop. This not only adds a charming detail to your ornament but also makes it easy to display on your Christmas tree!

FAQ
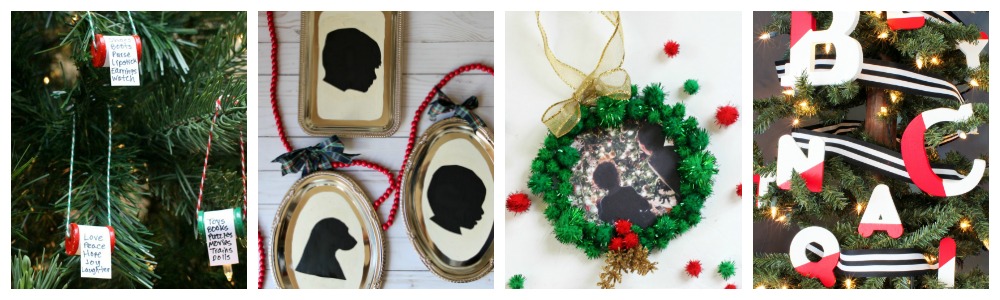
To add a personal touch to your photo frames, consider embellishing the edges of the hoop. If you want to add a bit of sparkle, simply run a small bead of white glue around the edge and sprinkle it with glitter, as shown above. You can also get creative with other decorative elements like colourful pom poms (this post has them added to the nose for a cute Reindeer), festive twine, or even make the edge into a mini wreath for a charming look like I did these photo ornaments. For added elegance, incorporate pearl rhinestones or glue a tiny piece of garland around the frame for some glam. These embellishments not only enhance the visual appeal of your DIY Christmas decorations uniquely yours!
To turn the DIY ornament photo craft into a meaningful gift, consider using a photo that holds sentimental value, like a candid shot or a picture of a cherished moment. Personalize the ornament by adding a thoughtful message or the recipient’s name and the year. You can also make a set of ornaments for a family or couple, creating a unique collection that will bring lasting memories each holiday season.

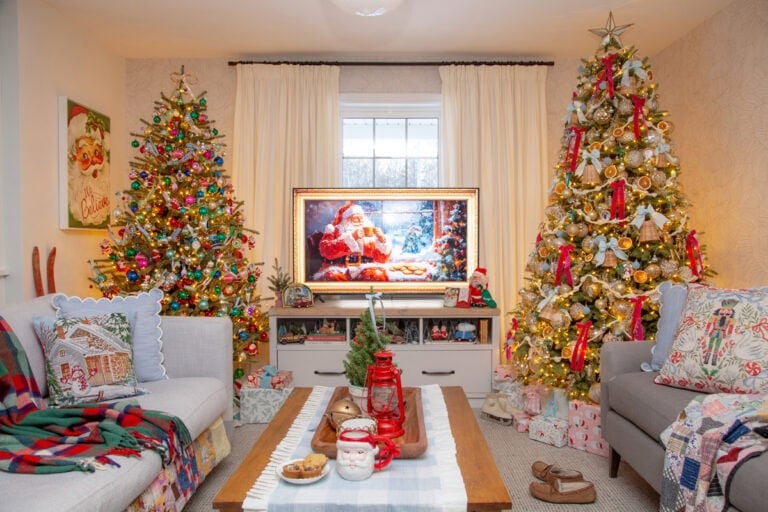
Creating DIY Christmas Photo Ornaments is a delightful way to showcase your cherished memories and personalize your holiday decor. With simple materials and a touch of creativity, you can craft unique ornaments that not only decorate your Christmas tree but also make thoughtful gifts. Whether you embellish your photo frames with glitter, twine, or rhinestones, each ornament will hold special significance. Gather your supplies, unleash your creativity, and enjoy making beautiful keepsakes that will be treasured for years to come!
Check Out These Blogs for More Christmas Ornament Ideas

The Happy Housie / The Wicker House / A Pretty Life / Place of My Taste
The Turquoise Home/ Satori Design for Living / Hymns and Verses / That’s me!
Green With Decor / Southern State of Mind / This is Our Bliss /Blue I Style


Such a cute momento you could recreate each year!
I love using that heat transfer paper. So much fun! Super cute ornaments 🙂
The link to your site from this 12 Simple DIY bloghop is incorrect, at least it is from the Turquoise Home. I had to do a google search for your site. Thought you might want to know. It’s a really cute idea. Thanks.
These are so cute Virginia…you are all adorable! And who knew you could use Canva do to this kind of thing…I love that program!